- Introduction
- Setup Prerequisites
- Campaign Workflow
- Step 1: Setup Campaign: “Helper Campaign: Decide on Response”
- Step 2: Setup Campaign “4 Week Cold Email Campaign (Absentee Owner)”
- Step 3: Get Absentee List
- Step 4: Add Absentee List Contacts to Absentee Email Campaign
- Dealing with replies
- Optional: Setup Warm Email Campaign
Introduction #
This guide is intended to help you create your first Absentee Owner Email campaign to begin marketing to this motivated seller segment as quickly and inexpensively as possible. This guide also shows you how to manage responses from those leads.
If you implement all of the steps in this guide, you should be ready to market to your first list and manage those leads in a systematic way.
What is an Absentee Owner? #
An Absentee Owner is one where the owner’s mailing address for property tax purposes is different than that of the property’s address.
There can be many reasons for this such as the owner being a landlord, or this is a second house, or possibly an inherited house. Many of these reasons are good indicators of motivation to sell.
What is a Campaign? #
Campaigns are simply sequences of items that are sent at a particular time, with a delay of any number of days.
The items that can be part of a sequence include Emails, Texts, as well as Tasks. A campaign sequence can have any number and any type of sequence items, so that for example you can create a complex sequence that sends an email, followed by a text message, followed by a task that is assigned to you to call the lead.
We have pre-written template campaigns that you can use to start with and build on that include:
4 Week Cold Email Campaign (Absentee Owner)
4 Week Cold Text Blast (Absentee Owner)
7 Month Keep Warm Email Campaign
And a few more…
In this guide we will be using the 4 Week Cold Email Campaign (Absentee Owner) campaign template to send email to Absentee Owner leads.
Why would you choose to start with sending an Email Campaign instead of an SMS campaign? #
If you have never created a campaign in REI/kit, then an email campaign may be a good place to start.
There are a few reasons why you might choose to start with sending an email campaign instead of a text campaign.
Email is the most inexpensive channel to get in front of leads, and so it is a good way to test your marketing message, as well as your CRM workflows while you learn how to use the system, before scaling out your marketing.
Text messages are designed for immediate response, so if you are not yet ready to talk with sellers, then you should use email instead of text messages until you are comfortable with more aggressive marketing tactics.
Setup Prerequisites #
There are a couple pre-requisites that are required for you to perform before setting up your email campaigns.
Virtual phone number #
Your REI/kit Virtual Phone number is a phone number that you provision inside REI/kit that will allow you to capture inbound calls as leads, make outbound calls to leads, and record and transcribe conversations with those leads into your CRM.
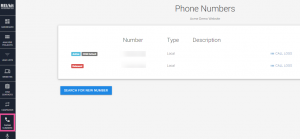
It is a good idea to use your REI/kit virtual phone number in your campaigns.
Account Company Profile #
Your account company profile will be used to fill in the information required for you to be compliant with the CAN-SPAM act. It is required that you to fill in your company address, city, state, zip, and phone number.
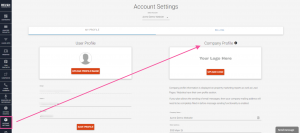
Note: Pay special attention to the State as this often gets overlooked in the account profile.
The phone number that you should enter here is your Virtual REI/kit phone number that you just created.
This way if a lead calls you using that phone number, that call will end up in your CRM as part of your communications with that lead.
Next, I’ll explain the optimal campaign setup, one that will use a combination of 2 or 3 different automation campaigns.
Campaign Workflow #
In order to create a campaign workflow that will ensure that no lead falls through the cracks, we will actually stitch several campaigns together that will help you work the leads efficiently.
The three campaign templates that we will use include:
4 Week Cold Email Campaign (Absentee Owner)
Helper Campaign: Decide on Response
(Optional) 7 Month Keep Warm Email Campaign
These campaigns will work together so that you can create the following workflow:

Step 1: Setup Campaign: “Helper Campaign: Decide on Response” #
The first campaign that you should set up is the Decide on Response campaign, whose job is to automatically assign tasks to you in the CRM, for you to decide on how to deal with replies to your Absentee Email campaign.
Create New Campaign #
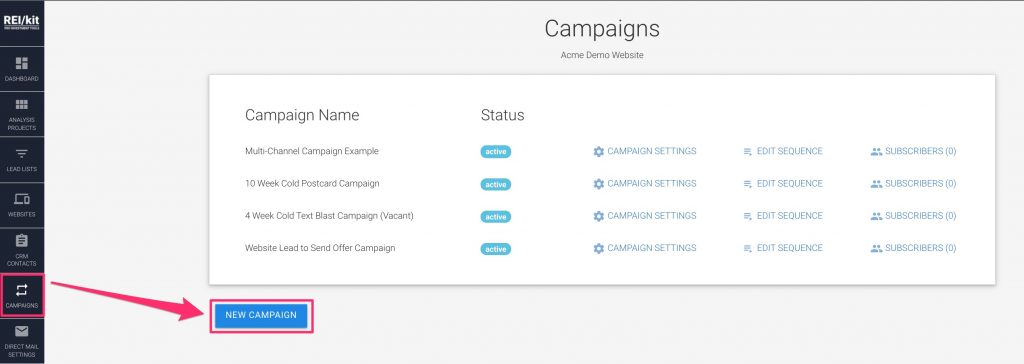
First, go to the Campaigns tool in the left hand navigation bar, then click the “NEW CAMPAIGN” button to bring up the new campaign form.
In the “New Campaign” form, select the Campaign Template: “Helper Campaign: Decide on Response”
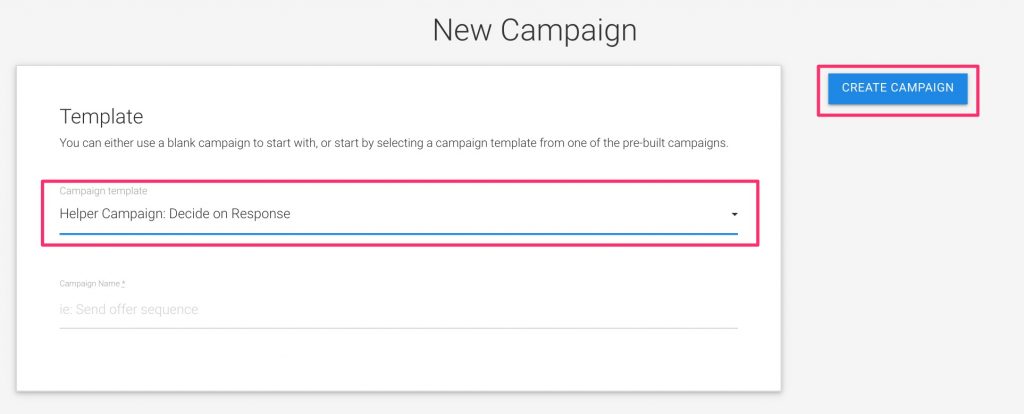
Then click the “CREATE CAMPAIGN” button in order to generate the campaign from this template.
Campaign Settings #
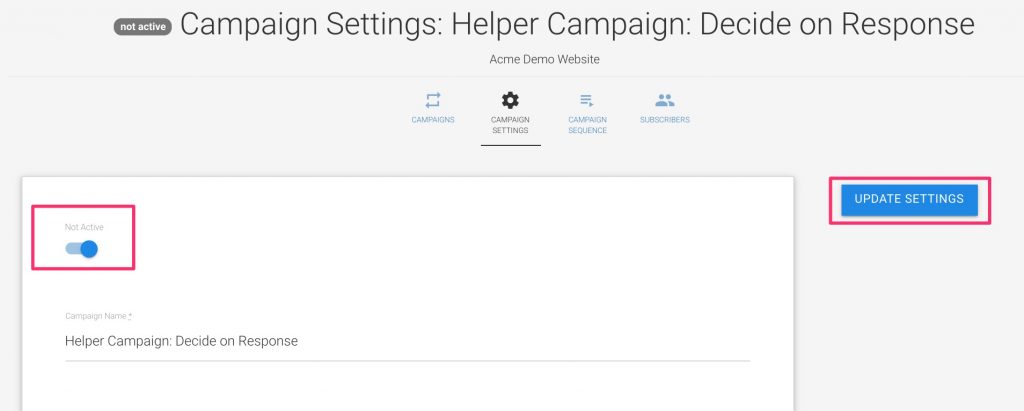
The only setting that you need to enable for this campaign is to publish it by making the “NOT ACTIVE” toggle blue, then clicking the “UPDATE SETTINGS” button.
Update Campaign Sequence Item #
The next step is for you to update the campaign sequence task item description and the assignment to the person who will be responsible for managing the lead replies.
To get there, click on the “CAMPAIGN SEQUENCE” icon in the top navigation, then click on “EDIT” next to the sequence item.
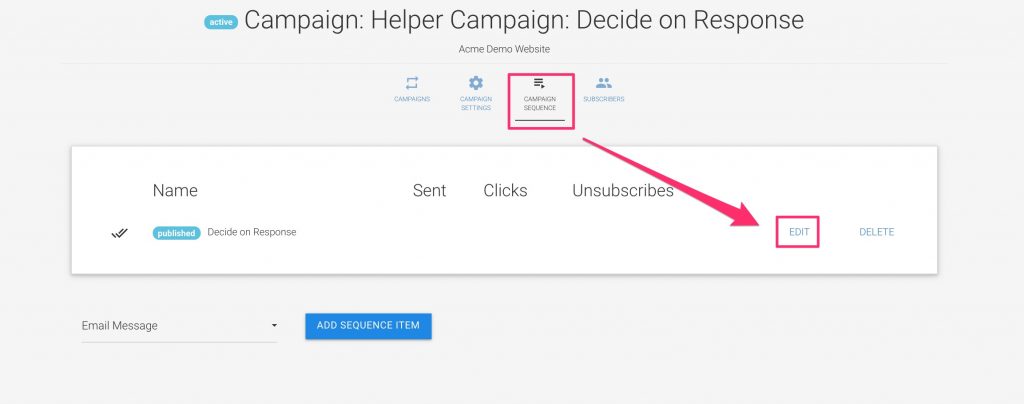
This will open up the Edit screen for this sequence item. In this instance, the item is of type: Task.
Let’s update the item Description and Assignment.
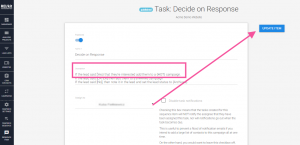
Description #
The Description of the task, says what you would like the person who is assigned to this task to do.
For our workflow, because we do not have a HOT campaign, we will edit the first line of the Description from:
If the lead said [YES] that they’re interested add them to a (HOT) campaign.
To:
If the lead said [YES] that they’re interested, then (send them an email).
Task Assignment #
Here you will select who to assign this Task to when a lead replies to your Absentee Email campaign.
If you’re a solo investor, assign it to yourself, otherwise assign it to the team member who will be responsible for lead follow up.
Save your Changes #
Once you’re done with assignment you will need to click the “UPDATE ITEM” button to save your changes.
This completes the Decide on Response campaign set up. Now we’re ready to set up the Absentee Owner Email Campaign.
Step 2: Setup Campaign “4 Week Cold Email Campaign (Absentee Owner)” #
Here we’ll set up the main campaign that will be sent out to your Absentee Owners.
Create New Campaign #
To create this campaign, go back to the Campaigns tool in the left-hand navigation bar, then click the “NEW CAMPAIGN” button to bring up the new campaign form.

In the “New Campaign” form, select the Campaign Template: “4 Week Cold Email Campaign (Absentee Owner)”.
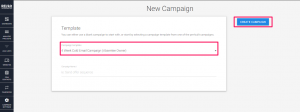
Then click the “CREATE CAMPAIGN” button in order to generate the campaign from this template.
Campaign Settings #
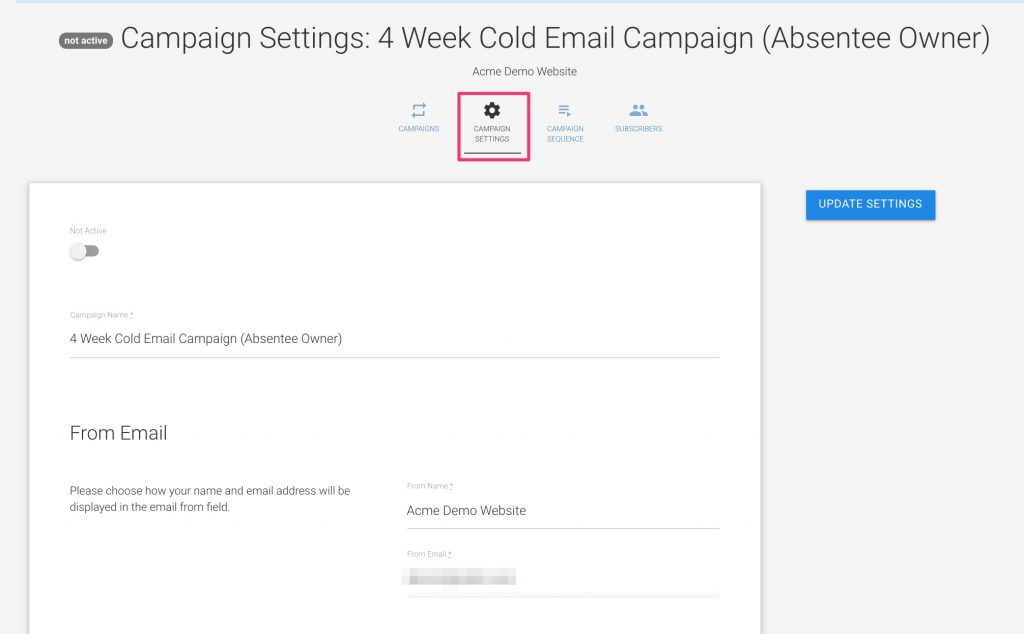
The default settings are optimal for this campaign, and you should only update the following settings.
From Email #
You can choose how the From Name appears in your lead’s inboxes, as well as the email address that the replies will go to.

This will be automatically prefilled with the account profile email address.
It is highly recommended that the email address be the email address that is either associated with the account in the account settings, or the email address associated with the team member who will be responsible for following up with the leads.
Using any email not associated with your team in the system will make it impossible to record the email communications in the CRM.
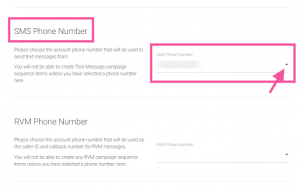
SMS Phone Number #
Choose the Virtual phone number that you have created earlier.
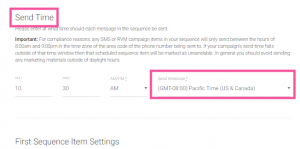
Send Time #
Please choose what time the emails from each sequence item should go out each day.
Move to Another Campaign After Reply #
This is where you will select your previously created “Decide on Response” campaign.
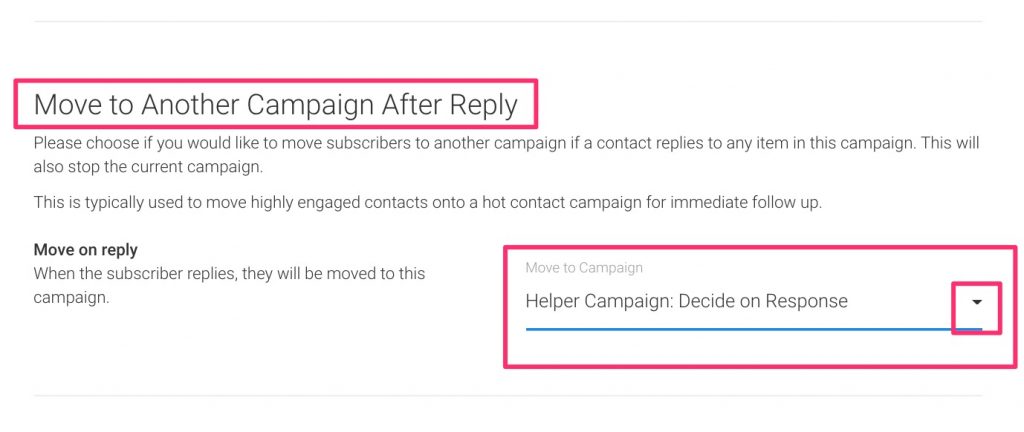
What this means, is that when a lead replies to one of your campaign emails, the lead will be removed from the Absentee campaign, and moved into the Decide campaign so that your lead manager can decide how to respond to the lead.
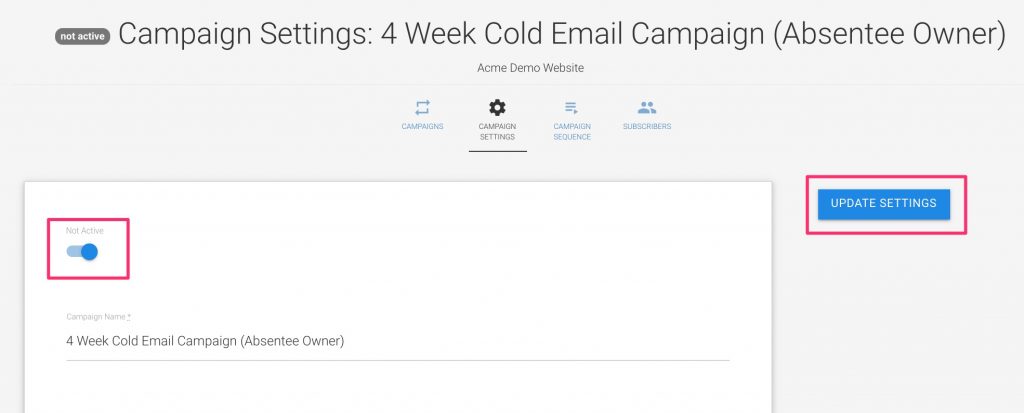
Activate Campaign & Save #
Next you should scroll up to the top, and click the NOT ACTIVE toggle to make it blue and activate the campaign, and then click the “UPDATE SETTINGS” button to save your changes.
Next, let’s review this campaign’s sequence items.
Review Campaign Sequence Items #
To review each of the Sequence Items, click on the “CAMPAIGN SEQUENCE” button in the left-hand navigation, then click on each item’s EDIT button to review the text of the sequence item.
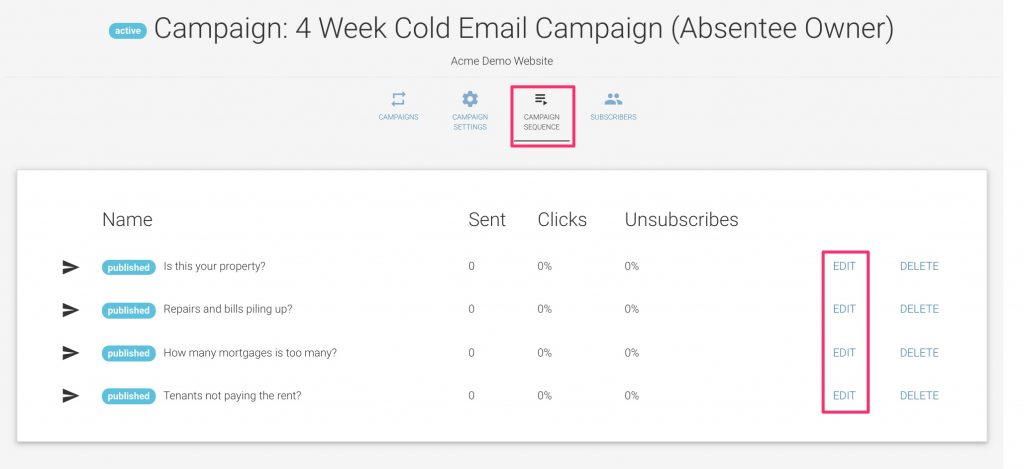
You should review each sequence item to make sure that it says what you would like it to say, and to personalize it for your needs.
Now that your campaigns are set up, it’s time to get your list of Absentee Owners.
Step 3: Get Absentee List #
All plans come with access to the Lead List tool where you can download X number of lead credits, and if you wish, purchase additional leads beyond your lead credit limit at the rate appropriate to that plan.
100% of all of our leads come pre-skip traced with phone numbers, and email addresses are available for about 40-50% of the records.
Create List #
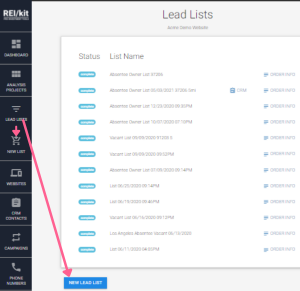
To get a list of Absentee Leads go to the “LEAD LISTS” tool in the left-hand navigation, then click the “NEW LEAD LIST” button to create a new list.
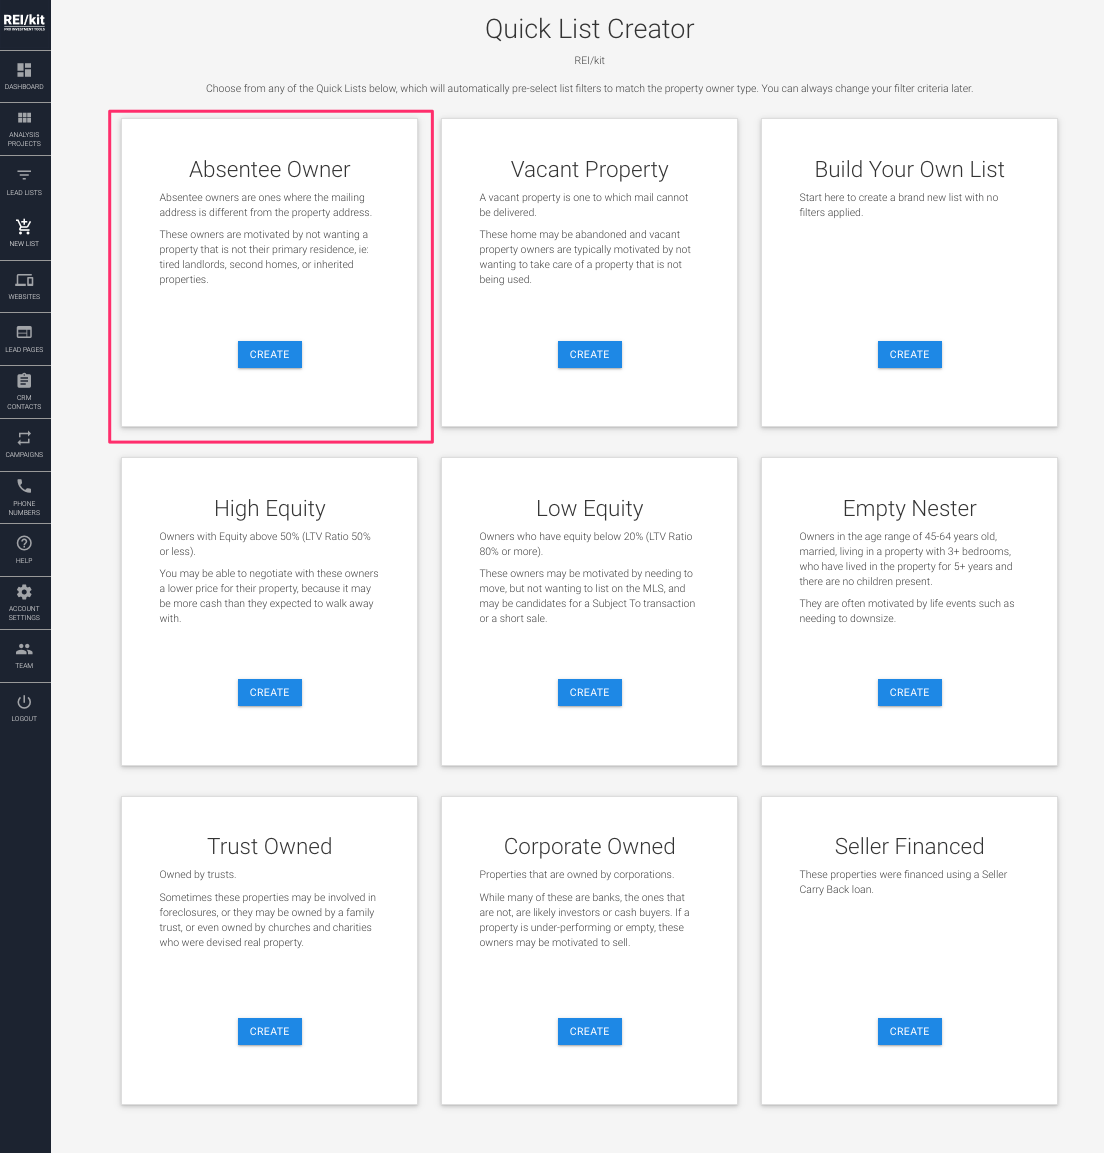
In the next screen you should select the Absentee Owner quick creator list type.
This will create a list in draft status, with the filter selected where the Owner Type is Absentee.
The next step is to filter the list to limit it to your farm area.
List Filtering #
Geography #
The most important list filter is the geography filter. This should be the primary way in which way you determine the size of your list.
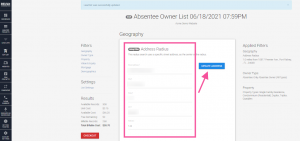
The best strategy to use here is to create a grid of radiuses from the center point address of each grid area as a separate list.
For example, say that you are on the Scale plan and wanted to use your monthly 250 lead credits to market to absentee owners in your city. In that case you would look at Google Maps to plan out a grid of address radius searches where the center point is an address (a) and with a radius of X miles.
You would then use each address radius search as a separate list.
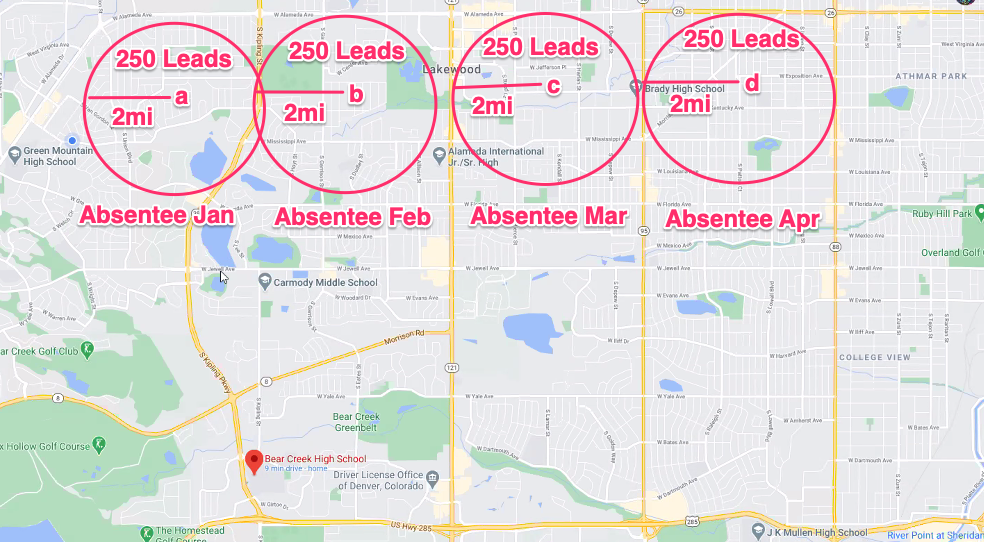
This little bit of planning will ensure that your leads are unique in the system and that you market to a new set of leads each time.
Other Filters #
You can, of course, use other filters to limit the number and type of results, in which case you may need to to increase your radius if you wanted to maintain the same lead count.
List Settings: Limit Filter #
Other than using list filtering criteria to limit the size of your list results, in the “List Settings” section of the list you can limit the quantity of leads requested so as not to exceed your included lead credits (or desired list size).
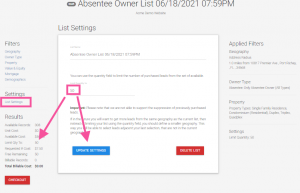
You should avoid using this as your primary list size limiting strategy until you have sufficiently limited the Available Records using the grid of your farm area as described above, so as to prevent the retrieval of duplicate leads on your next list.
So for example in the picture above, the Available Records was reduced to 50 by using a small enough radius from a center point, and only then was the Limit Qty set to 99 so as to stay below the 100 Free Remaining from the monthly lead credits.
Checkout #
Once you have dialed in the list size, you can then click the “CHECKOUT” button on the list to order the requested leads.
You will only be charged for any lead records that are beyond your included monthly lead credit.
Once you click on “PURCHASE LEADS” the leads provisioning process will work for about a minute per 1,000 leads requested. You can refresh the page to get the current list provisioning status.
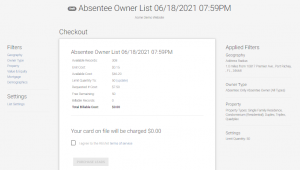
This process ends with your leads in your CRM, each one tagged with the name of your list.
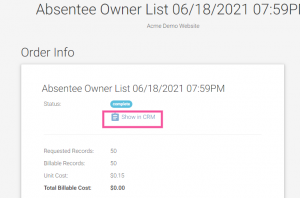
You can get to that list in your CRM by clicking on the “Show in CRM” link, which automatically filters the CRM with the tag of your list.
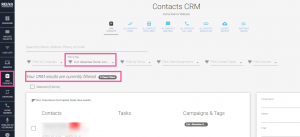
The next step is to add your Absentee Owner leads from your list to your newly created email campaign.
Step 4: Add Absentee List Contacts to Absentee Email Campaign #
Because at this moment the CRM is already filtered with your Lead List tag, all you need to do to add these contacts to the campaign is to:
1) Click the ‘Select All’ checkbox;
2) Select “Add to Campaign” from the Bulk Action select;
3) Select your “4 Week Cold Email Campaign” that you created earlier; and
4) click the “ADD TO CAMPAIGN” button to add your selected leads to the campaign.
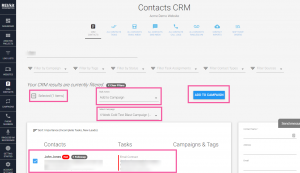
It may take a few minutes to process adding all of the selected leads to a campaign, and once they are added, they will be scheduled to send.
The time that they will send was determined in the send time fields in the Campaign’s settings.
That’s it. You have now scheduled the sending of your fully configured automated email campaign to your leads, with responses assigned as tasks for your lead manager.
Dealing with replies #
Now that you have sent your campaign, you should expect that you will get replies to your outbound outreach.
What happens when someone replies? #
When someone replies to one of your emails, that reply will first get routed and saved to the CRM system in that contact’s inbox.
Then, the CRM will forward that lead’s reply to the email address configured in the “From Email” in the Campaign Settings.
Next, the CRM will trigger the “Move on Reply” campaign, assigning the “Decide on Response” task to the configured assignee.
That assignee will get an email that the “Decide on Response” task has been assigned to them for a particular lead.
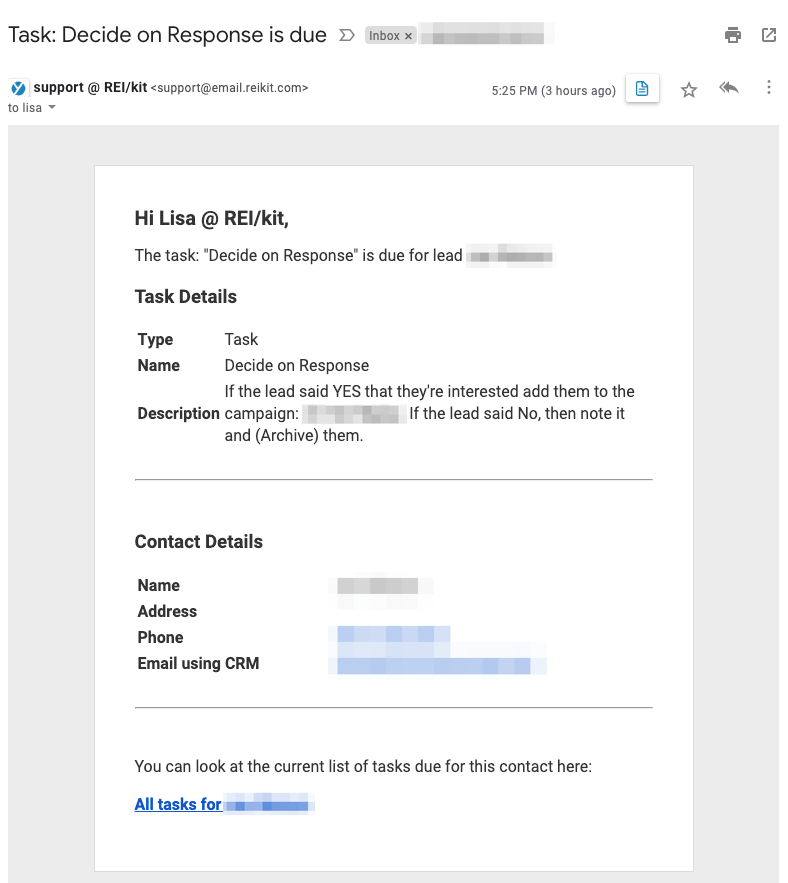
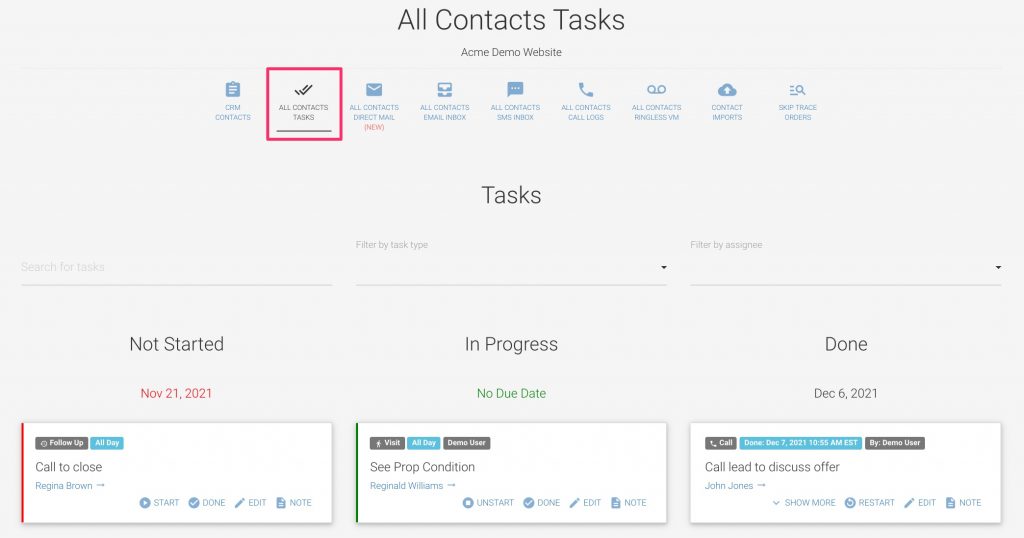
And they will also see that Task in their CRM view:
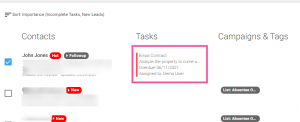
and in the All Contacts Tasks view:
The next thing your lead manager should do, is to look at the response in that contact’s message inbox to determine what to do next.
What to do when someone replies with a “Yes” or “Interested” #
This is what we all hope for, and therefore it is imperative to answer these emails as quickly as possible. With a hot lead, every second counts.
You can reply to the contact’s reply either from your email inbox to which the email was forwarded to, or from the CRM itself.
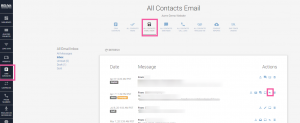
Note: Replying from your email inbox requires that you reply using the same email account of the email address associated with the user in the CRM and the email address in the From email set in the campaign.
A “Yes” reply from a lead at this point just points to a person with a need. You should therefore remember that they don’t yet know who you are, and that you still need to establish rapport with this person, and build trust before you can close any deals.
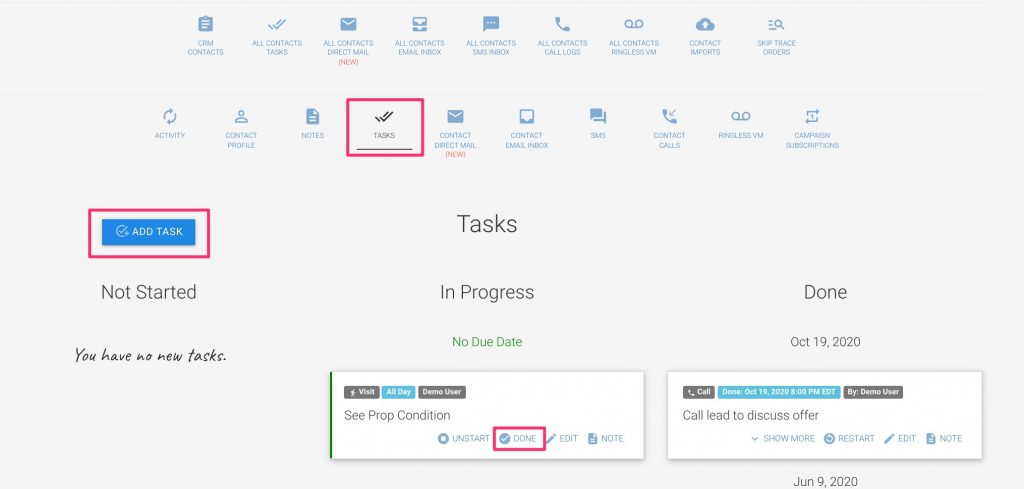
Once you’re done with your reply, you can go into the Tasks for that lead to mark your response as completed, and schedule the next follow up task for a few days out.
What to do when someone replies with a “No” #
Unfortunately, you will get many “Nos”. That just comes with the territory of cold outbound outreach. Some of them will be nice, some of them won’t be nice, and some of them may even be threatening.
In any case, you should follow the same steps:
First, do not reply. Especially do not engage with someone who is threatening. Just ignore these messages.
Next, go to the CONTACT PROFILE in the left navigation and mark the contact status as Archived.
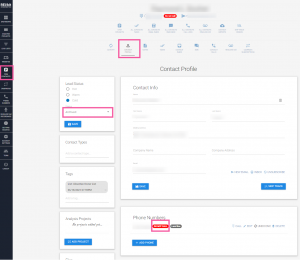
This will mark the lead not contactable so that they cannot be emailed or called or texted again.
Important: You should not Delete the lead, as then you will lose the history of this interaction and will lose knowledge that this lead should no longer be contacted.
If the lead has phone numbers, you may also opt to also set their phone number to DO NOT CALL status, to ensure that you no longer contact them in any way.
What to do when someone replies with a “Maybe Later” #
If someone replies that they are interested in talking, but not right now, instead in a few months, then this would be a good time to put them on a Warm follow up campaign.
Optional: Setup Warm Email Campaign #
In order to set up a Warm Email Campaign, you can use our Warm Email template as a starting point.
To set it up, you can follow the same steps as you did in Step 2, to set up the Absentee Campaign.
Create New Campaign #
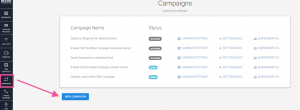
First create a new campaign by going back to the Campaigns tool in the left-hand navigation bar, then clicking the “NEW CAMPAIGN” button to bring up the new campaign form.
In the “New Campaign” form, select the Campaign Template: “7 Month Keep Warm Email Campaign”.
Name this campaign something like: “Keep Warm Absentee Email Campaign”
This will distinguish it from other Keep Warm campaigns.
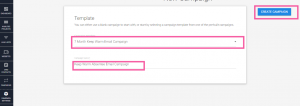
When you’re done click the “CREATE CAMPAIGN” button in order to generate the campaign from this template.
Campaign Settings #
The default settings are optimal for this campaign, and you should only update the following settings.
From Email #
Again, you can choose how the From Name appears in your lead’s inboxes, as well as who the email address that the replies will go to.
SMS Phone Number #
Choose the Virtual phone number that you have created earlier.
Send Time #
Please choose what time the emails from each sequence item should go out each day.
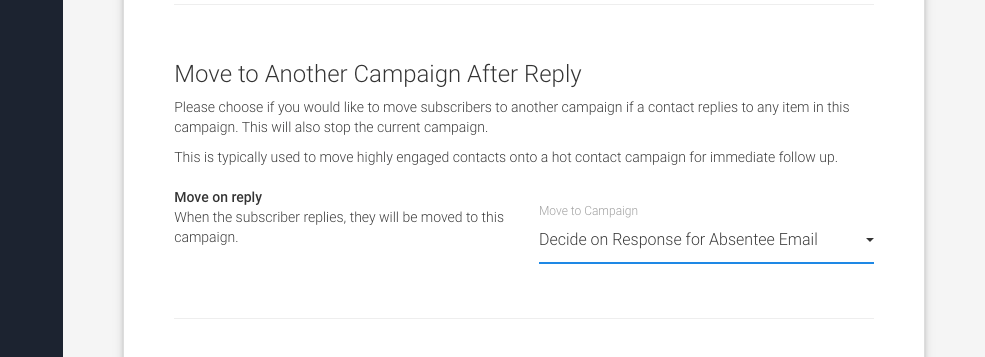
Move to Another Campaign After Reply #
This is where you will also select your “Decide on Response for Absentee Email” campaign.
Activate Campaign & Save #
Next you should scroll up to the top, and click the NOT ACTIVE toggle to make it blue and activate the campaign, and then click the “UPDATE SETTINGS” button to save your changes.

Review and Update Campaign Sequence Items #
You should personalize your campaign sequence item text and make it more relevant to Absentee Owners.
To review and update the text of each of the Sequence Items, click on the “CAMPAIGN SEQUENCE” button in the left-hand navigation, then click on each item’s EDIT button to review and update the text of the sequence item.
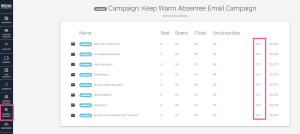
The text of the generic Warm Email Campaign template sequence items that were generated for you is more specific to website leads, and therefore should be updated with content more geared toward the Cold Absentee Owner Email Campaign that you are sending.
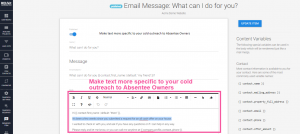
You should do this for every sequence item in this Keep Warm campaign.
How to Use the Keep Warm Campaign #
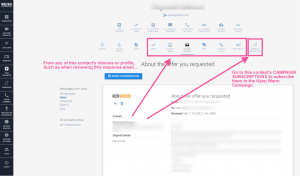
Now, whenever anyone replies to your cold Absentee Email Campaign and says, “I’m interested but please get back to me in a few months, you can put them on this new email campaign by following these steps:
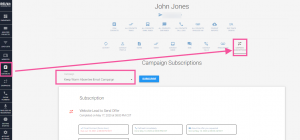
From the CRM email response that you are reviewing for this lead, or from any other area in this contact’s profile click on the “CAMPAIGN SUBSCRIPTIONS” button for this contact in the left hand navigation to subscribe them to the Keep Warm campaign.
Where you can select the “Keep Warm Absentee Email Campaign” that you just created, and click the “SUBSCRIBE” button to add the contact to this campaign.
So that’s it. Now, every few weeks, your automated Keep Warm campaign will work for you to keep you at top of mind of this lead, and when they’re ready to talk, you will be the first one that they think of to contact, because you have been staying in touch long after everyone else has given up.


