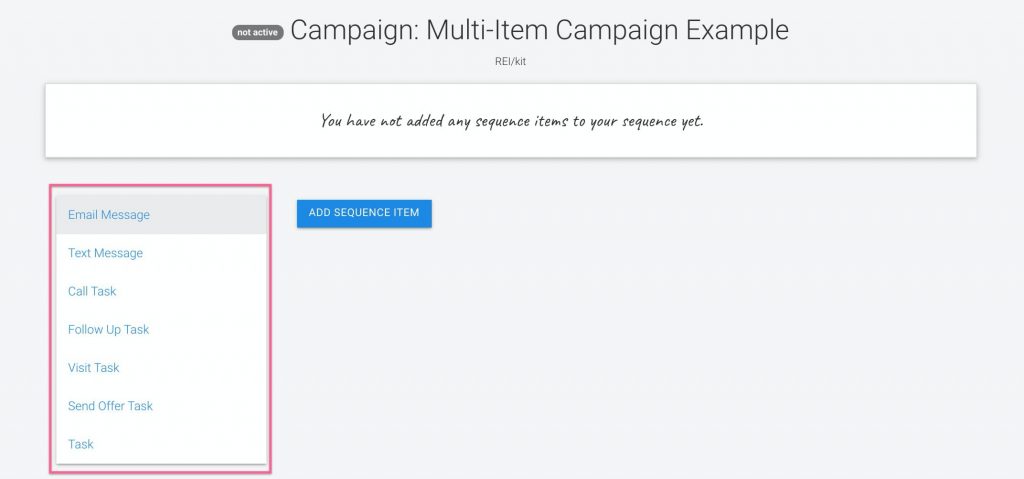
- Campaign Sequence Items
- Viewing a Campaign Sequence
- Editing Items in a Campaign Sequence
Campaign Sequence Items #
There are a variety of campaign sequence item types that you can choose from when creating your sequences, including Direct Mail Postcards, Emails, Text messages, Ringless Voicemails as well as Tasks.
Creating Sequence Items #
Common Settings #
When first creating a sequence item of each type, there are some common settings that you will see.
Name #
Type in a descriptive name for each sequence item to distinguish it from other items in the same campaign.
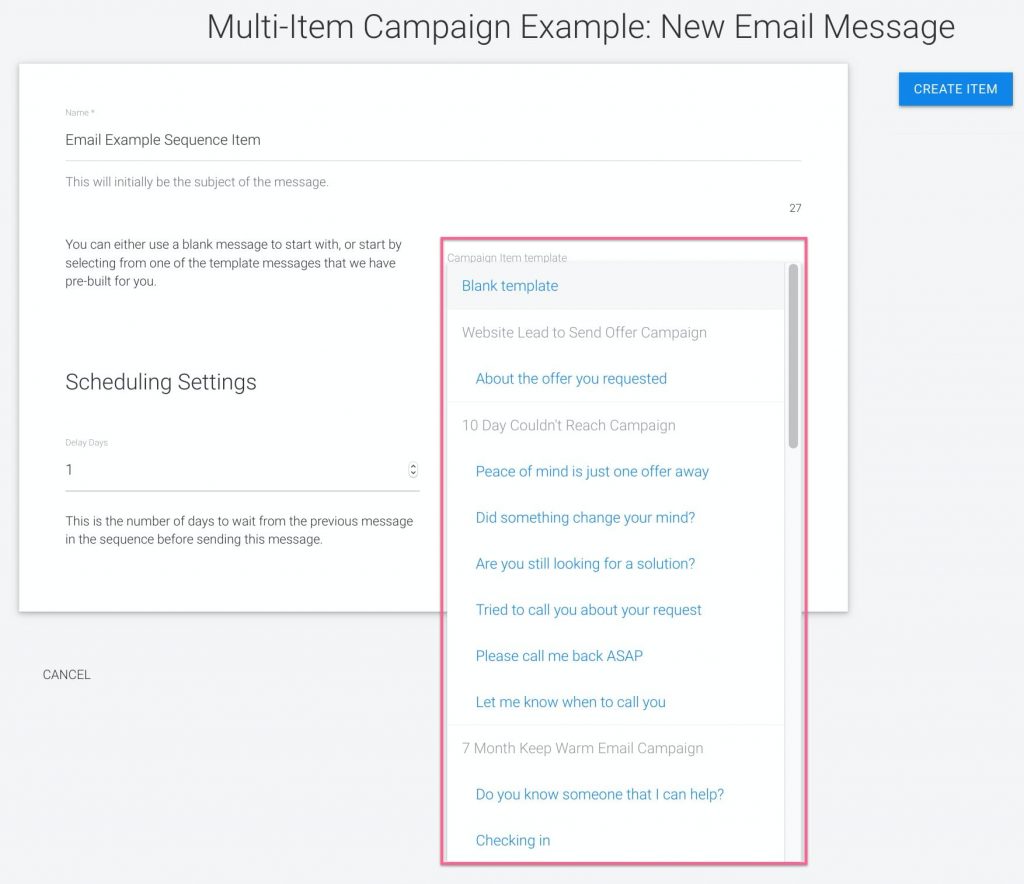
Campaign Item Template (Emails Only) #
If you have selected an email campaign sequence item, then you can select either from a blank email template to create your own email, or choose from any of the pre-written emails available throughout our existing campaigns:
Scheduling Settings #
If creating a sequence of items, you will need to specify in the tool the order in which each item in the sequence should be set. You do this by typing in the delay of days between each item, and the item order.
Delay Days #
The first item to be sent out will have a delay of 1 day, unless you want it to go out immediately, which would be a delay of 0 days.
For each additional item that will be scheduled, type in the delay between the items as measured in days.
Example:
Email 1: Delay Days = 1
Email 2: Delay Days = 6 (Sends on day 7)
Email 3: Delay Days = 5 (Sends on day 12)
Item Order #
The first item to be sent out has an item order of 1.
For each additional item that will be scheduled, type in the order in which you want the item to be sent.
Example:
Email 1: Item Order = 1
Email 2: Item Order = 2
Email 3: Item Order = 3
You can re-order your item sequences with this method as well.
Note: For convenience, by default the system increases the Item Order by one for every new item that you add to a sequence.
The next screen after you click the blue Create Item button will allow you to edit the specific attributes of each campaign sequence item, as well as send a test message and change your scheduling settings.
Next we’ll discuss the attributes specific to each campaign item type.
Email Message Sequence Item Settings #
When you create an Email Message campaign sequence item type, you will see the following additional setup options appear:
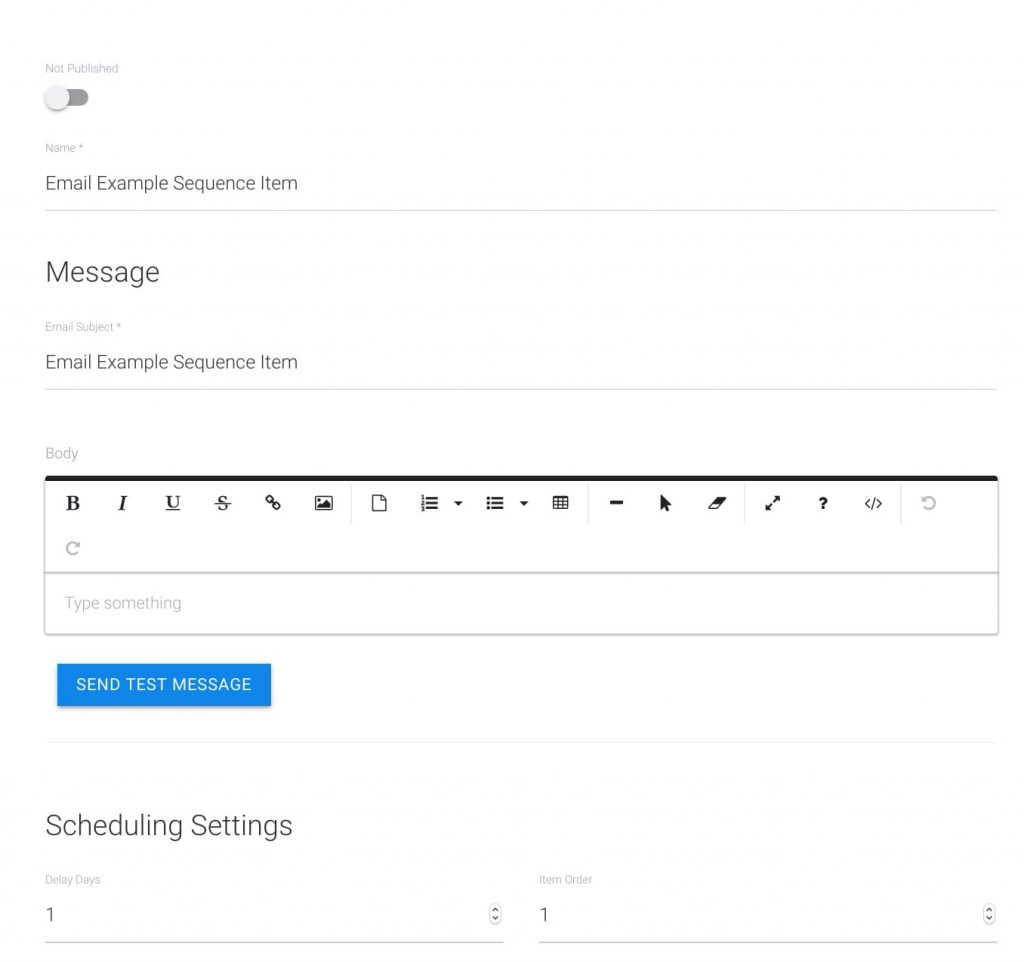
Email Subject #
Type in the Subject Line that the lead will see in their inbox when receiving the email. You can change this later if needed.
Note: This is copied over from the name that you gave the sequence item, so double-check that the subject line is what you would like for your recipients to receive.
Editing the Body of the Email Message #
There are a variety of editing tools available in the toolbar allowing you to do anything from uploading a file (for example, if sending a blank contract) to adding images and hyperlinks.
To enter the text for the content of the email, start typing into the field where it says “Type something.”
Send Test Message #
To view what your email will look like when the recipient receives it, click on the Send Test Message button and then enter in your email address, or multiple email addresses separated by a comma.
Keep in mind that if there are any Content Variables (see advanced) in your email body, only basic variables will be populated in the test message that you receive.
Text Message Sequence Item Settings #
When you create a Text Message campaign sequence item type, you will see the following additional setup options appear:
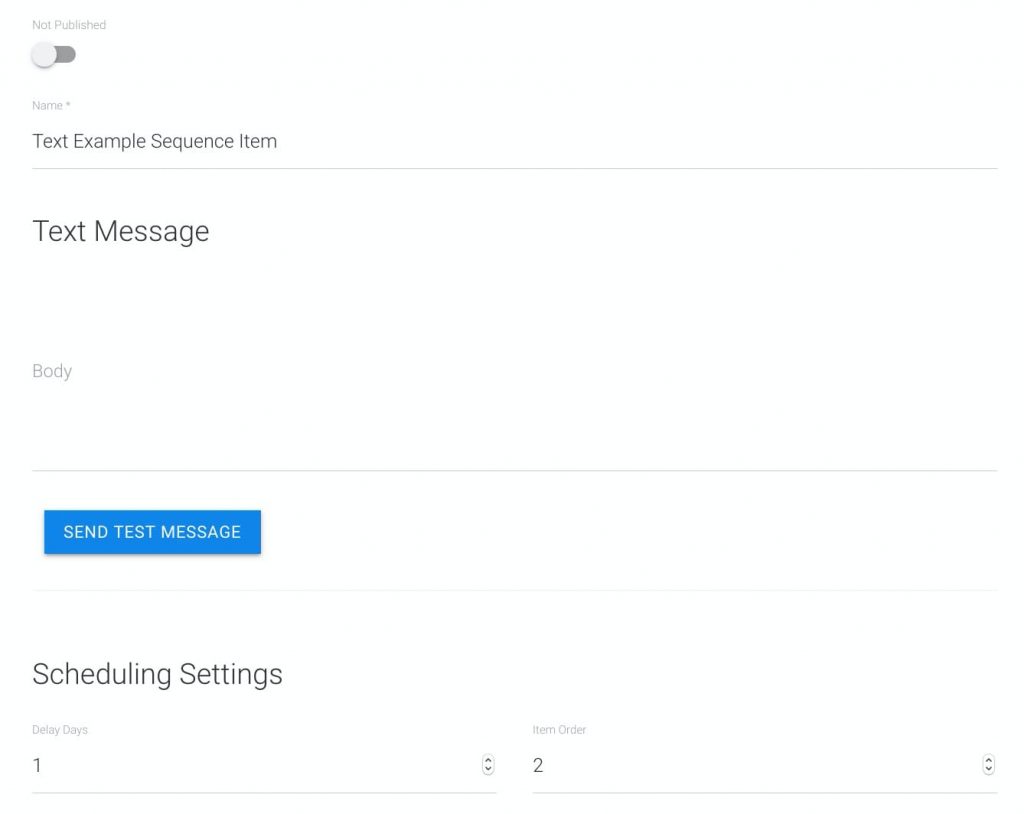
Editing the Body of the Text Message #
To enter the text for the content of the text message, start typing into the field where it says “Body.”
Follow the strategies in this guide for Best Practices for Text Message Campaign Deliverability.
Be aware, that text messages are billed in blocks of 160 characters. If your text message is 180 characters, for example, then you will be billed for 2 text messages each time this campaign sequence item sends.
Update Item #
Make sure you click the “UPDATE ITEM” button once you are done editing.
Send Test Message #
To view what your text message will look like when the recipient receives it, click on the “SEND TEST MESSAGE” button and then enter in your phone number, including the area code.
Ringless Voicemail Sequence Item Settings #
When you create a Ringless Voicemail campaign sequence item type, you will see the following additional setup options appear:
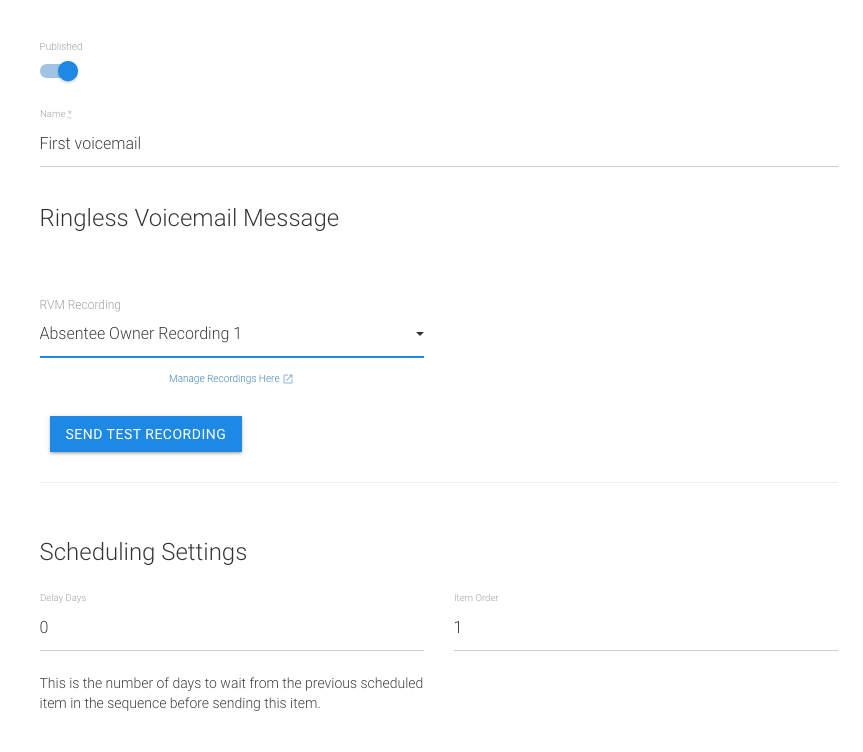
RVM Recording #
Here you will select from your pre-recorded voicemails that you have previously added to your account’s RVM Recordings settings.
Update Item #
Make sure you click the “UPDATE ITEM” button once you have selected your recording to save it to this sequence item. Once the recording is saved, the item will show player controls for the recording that you have selected.
Send Test Recording #
To send a test Ringless Voicemail message to yourself, click on the “SEND TEST RECORDING” button and then enter in your phone number, including the area code, and click SEND.
Be patient, it can take up to 30 minutes for an RVM to be delivered to your phone.
Task Sequence Item Settings #
When a Task sequence item gets triggered, it will create a Task for someone on your team in your CRM.
There are several types of Task Items including:
- Call Task
- Follow Up Task
- Visit Task
- Send Offer Task
- Task
All of these tasks are just tasks, and the type is only to give the person who gets assigned this task a quick way to know what will be required of them.

Description #
This will be the text that appears in the Tasks tab for this task.
For example, if this was a Call Task, the description could be something like:
“Call the lead to see if they are interested with this script:
Hello Mr Homeowner,
I’m so and so from Acme company calling the neighborhood trying to find a property to buy. Would you know if any of your neighbors are interested in selling?”
This way, whoever gets this task assigned to them will know exactly what to do.
Assign To #
If you have other members on your REI/kit Team account, such as an associate or a virtual assistant, you may select that team member from this drop-down.
If you do not select someone to get assigned this task, then it will be assigned to the account owner by default.
After the task is assigned, the team member will be able to filter for their assigned tasks from the main CRM screen.
Saving & Publishing Sequence Items #
When you are done creating or editing each of your sequence items, then you will want to publish them.
Not Published #
Toggle this on to Published when ready.
Update Settings #
When you are done editing a campaign sequence item, make sure to save your changes by clicking the “UPDATE ITEM” button.
Advanced: Content Variables #
What are Content Variables #
Content Variables are dynamic placeholders for specific strings of text; that is, the text is pulled in from another location in REI/kit.
Not only do these Content Variables personalize your emails and text, but they save you time you would spend manually typing in a unique value, such as lead’s name or property address for every email and text.
For example, we use these variables to personalize our pre-written emails and texts; the emails use a Content Variable in the place of a lead’s first name:
![]()
This Content Variable is a signal to the system to use the lead’s first name — as it is written in the CRM — in the email or text.
The secondary part, “default: “there”” simply tells the system that if there is no first name available in the CRM for that lead, that it should display the phrase “Hi there” instead.
Other Content Variables you might see in the emails or texts will pull in information from your Account Settings Company Profile, such as your business name, business phone, business email address, or website url.
Where Can You Use Content Variables? #
Content variables can be used in the subject as well as the body of Email Message sequence types, and the body of Text Message sequence types.
Removing Content Variables #
Should you not want to use these Content Variables, simply delete the Content Variable text where you see it (including the curly braces {{}}), and type in your desired text in its place.
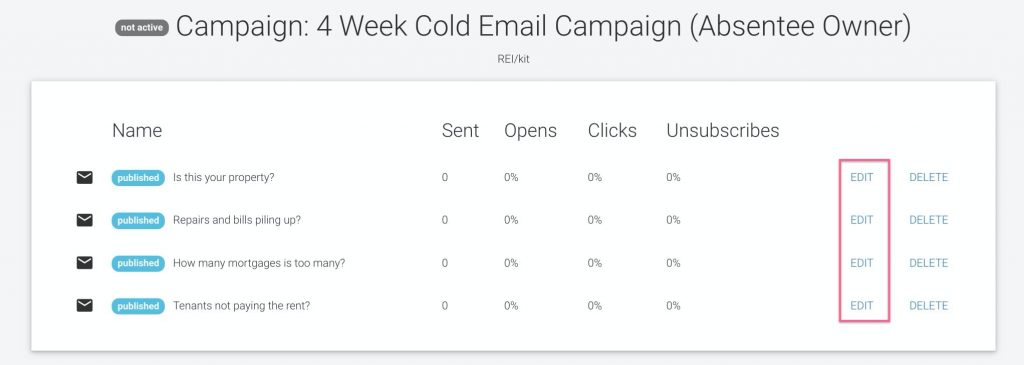
Viewing a Campaign Sequence #
You can view the sequence of items or specific items in a campaign by either of three ways: by clicking the ‘Edit Sequence’ link on the main Campaigns screen:

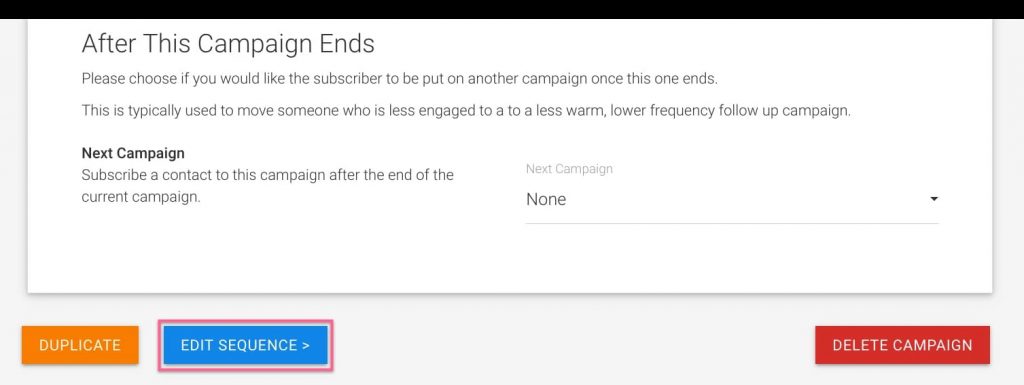
Via the Campaign Settings screen at the very bottom by clicking the ‘Edit Sequence’ button:
Or, if currently editing an item, click on the ‘Campaign Sequence’ icon in the left-hand navigation bar:
![]()
On this Campaign items screen, you will see the items in the campaign from top to bottom listed in the order in which they will be sent.
Editing Items in a Campaign Sequence #
To view the setup and content of any item in the sequence, click the Edit link to the right of the item.