Introduction #
What is the Lead Lists Tool #
The Lead Lists tool is a lead generation tool that helps you get skip-traced motivated seller leads, by stacking your specific criteria within the geographic area that you want to market to.
Why Use the Lead Lists tool #
Leads are skip-traced and flow into the CRM automatically. By using the Lead Lists tool, you can get motivated seller leads lists that you can then put on a text, ringless voicemail, or email automation campaign.
Steps to Create a Lead List #
Step 1: Access the Lead Lists Tool #
Two ways to access the Lead Lists tool:
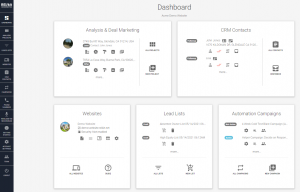
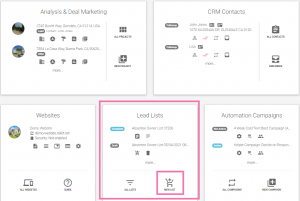
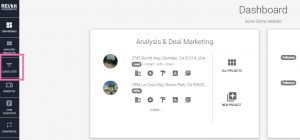
New List Icon in the Dashboard Box
The Lead Lists section on the dashboard will show the latest list that you have created.
If this is your first time creating one, this section will be blank.
Under the Lead Lists section, you will notice 2 icons:
The All Lists icon, which takes you to all the list you have created before that are in draft state, as well as those that have been purchased.
Another is the New List icon that will take you straight to the Quick Create Page.
The Lead Lists icon in the left-hand navigation column
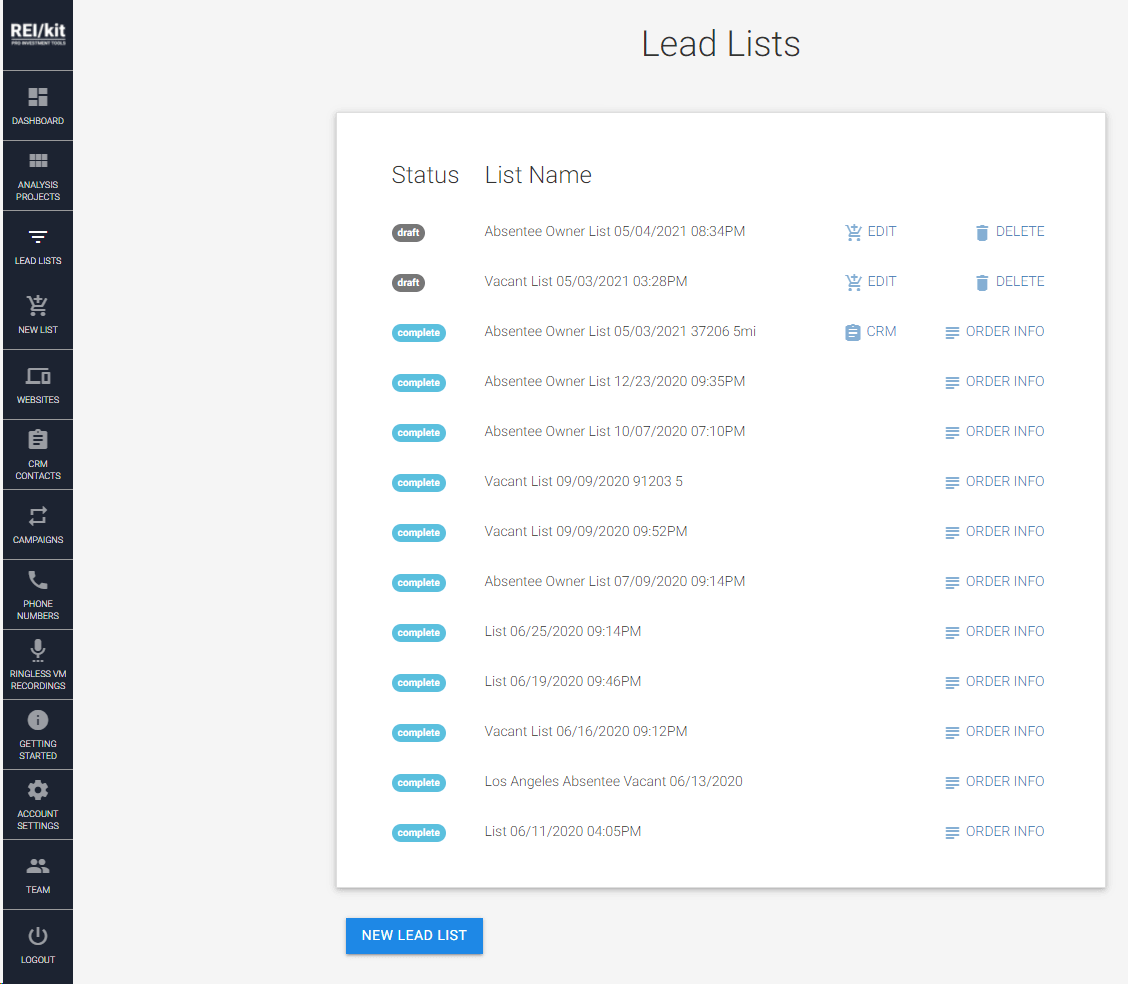
The Lead Lists icon will take you directly to the Lead Lists screen.
The Lead Lists screen allows you to see which of your lists are complete, with a link to go straight to the CRM to view just those leads in a filtered view.
You will also see on the Lead Lists screen the order information link, for the leads that you purchased.
To create a new list, click on the New List on the dashboard or on New Lead List under the Lead Lists icon on the navigation column. It will lead you to the Quick List Creator.
Note: Lead Lists in Draft mode can be accessed again by clicking on the Edit link, or by deleting the list with the Delete icon.

Step 2: Quick List Creator #
On this screen each of these tiles builds an instantly pre-filtered list, already built out for you for many of the most effective types of leads.
You have the ability to later stack additional criteria within any Quick Create lists that you create, as well as building your own lists of leads from scratch using the Build Your Own List button.
Next is an example of how to create an Absentee Owner lead list.
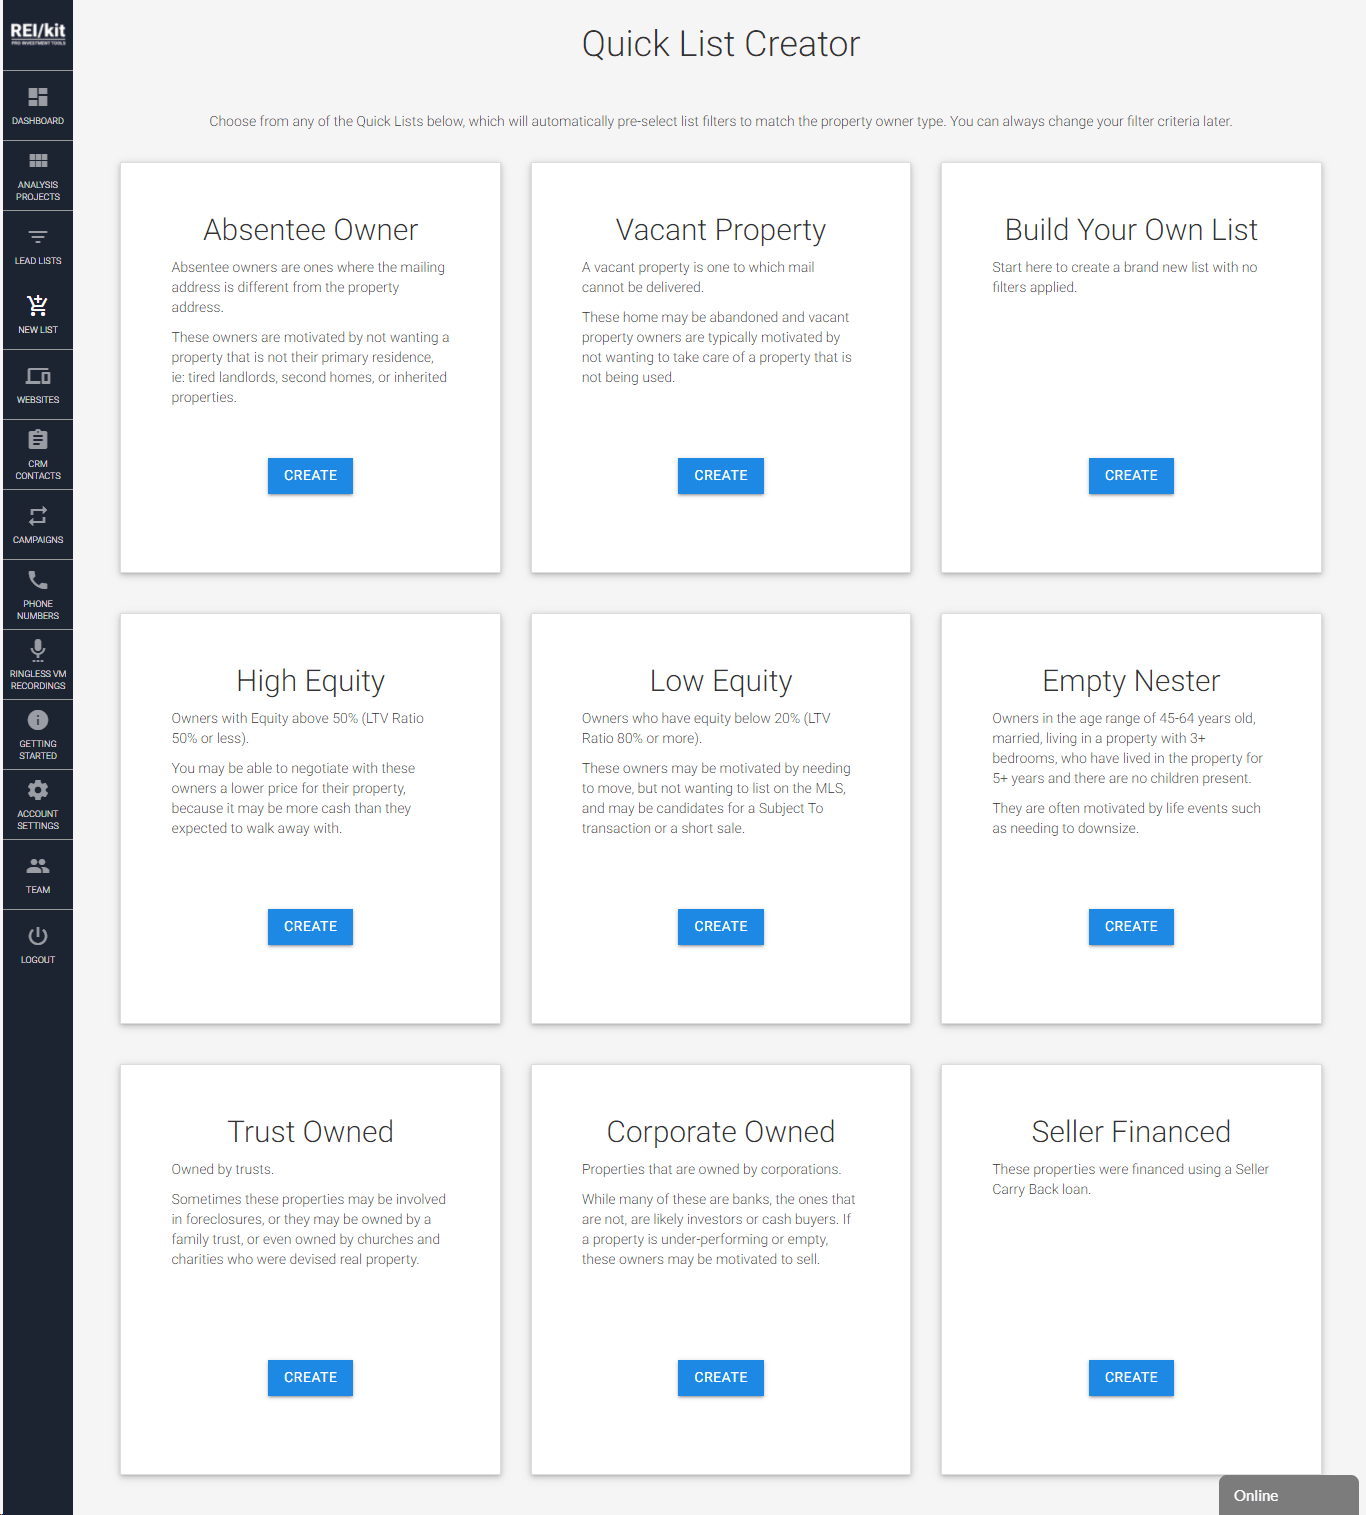
To create the Absentee Owner list, click on the Create button this will open the Lead List Screen and start your Lead List creation.
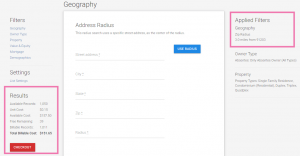
Lead List Screen: Navigation Overview #
The Lead Lists screen is where you will customize the Lead List that will be generated.
It shows 3 columns and shows five sections and their settings.
On the left hand-side we have the Filters, Settings, and Results.
The middle part shows the filter area where you will input your geographic search or filtering criteria.
The right-hand side shows any Applied Filters.
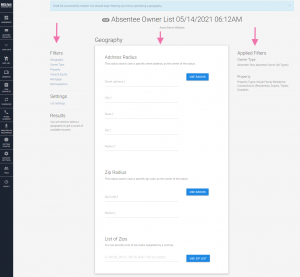
Let’s discuss this page in more detail.
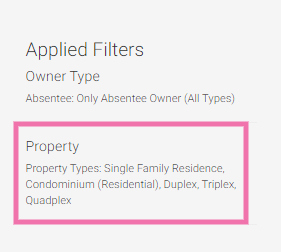
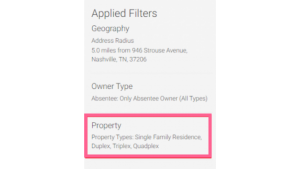
Applied Filters on the right side column
The REI/kit Lead Lists tool allows you to filter as well as stack all of the different criteria that you would like in your Lead List.
For example, here we have the Absentee Only Owner type that we’ve already pre-selected for you from the Quick List Creator.

We also have some additional filters that are pre-selected for you shown below.
In the general Property filter there are different types of property fields and here we display some of them: Single Family Residence, Residential Condominium, Duplex, Triplex and Quadplex.
Filters
On the upper left side, you will see the Filters section.
You can use these filters on top of your geographic results, to narrow down the results of your search.
You will see six different filters which contain 85 different criteria for stacking.

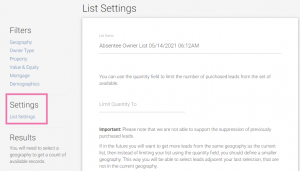
List Settings
This is where you can rename your lead list and limit your quantity.
Note about list naming: The name that you give your list becomes a tag on every lead within this list, and will be displayed as a filterable tag within the CRM for that lead as well.
Results
The Results section displays the total number of leads available for your selected geography and criteria.
More details on Results will be discussed further down this page.
Step 3: Specify a Geography #
Finally, we are on the geography screen, which is where you can select from three different ways to set your geography.
Now before you can create the lead list, you need to select one of three different radius types.
3 ways to specify geography #
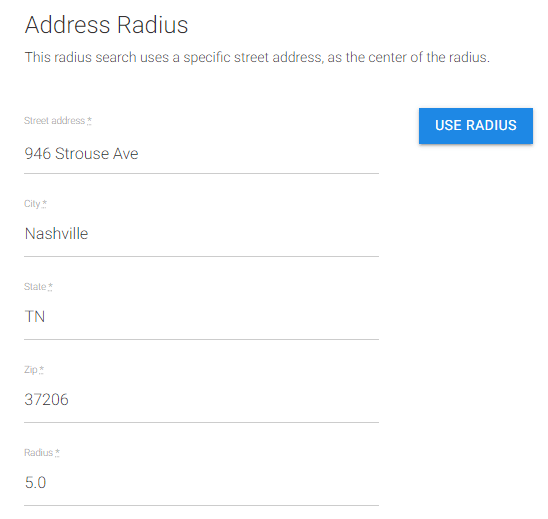
Address Radius
The first way to specify your geography is through Address Radius.
Type in a single address and specify how wide the radius you want your search results to be, up to 5 miles.
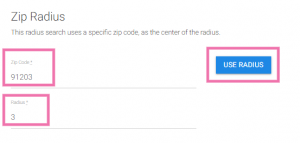
Zip Radius
Next down is the zip code radius. You can enter a zip code and then search up to a five-mile radius from here.
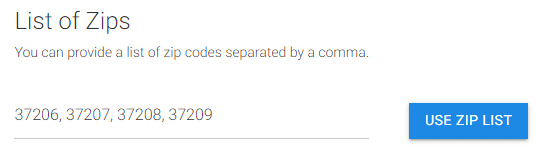
List of Zips
At the bottom is the List of Zips. This will be where you search properties by listing the zip codes. You can input up to 190 zip codes separated by commas.
After you have selected one of the 3 different address types, you must click on the Use Radius or Use Zip List button in order to activate it.
Step 4: Narrow Your Results #
Removing and Adding Criteria #
You can remove or add any of the pre-filtered results.
For example to remove Condominiums (Residential), you would simply click on the Property filter on the upper left of the screen.
In the Property Types screen, deselect Condominiums (Residential) from your property type.
Once you have deselected or selected a particular criteria, you have to click on the Save filter button, which we do now.
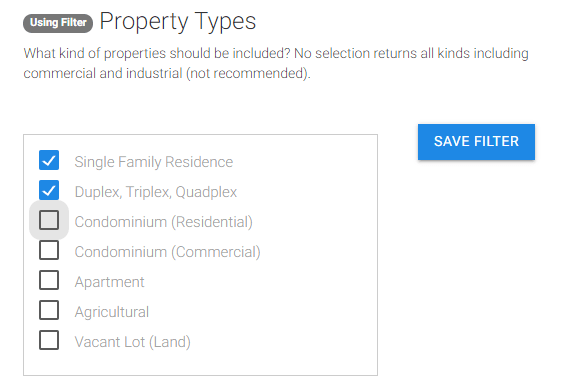
Note: On the right hand side, under Applied Filters, the Condominium filter has been removed, and the available number of records under Results has been updated.
At this point in the Results section, you will see the count of leads for the Absentee leads, with those specific property criteria, within that geographic area.
The radius is now updated on the right hand side under applied filters showing the three miles from 91203.
Results Section #
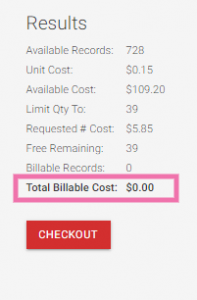
The first item you will see is the Available Records.
These are the total results that matches the criteria that you see on the right-hand side of the screen.
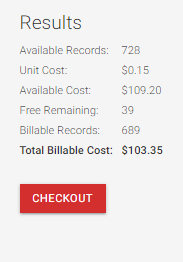
Unit Cost:
The Unit Cost is shown under Available Records.
Unit Cost is shown according to the subscription plan that you are on.
In this particular plan, the unit cost is 15 cents per lead, above and beyond any free lead credits that you get every month.
Available Cost:
In addition, we also have the Available Cost.
The available cost is the Available Records, multiplied by the unit cost.
Free Remaining:
The Result section also shows the Free Remaining credit on this account, which is 39 free credits.
Billable Records
The Billable Records shows the Available Cost minus the Free Remaining credits.
This account has a total of 689 billable records.
Billable Cost
Last, we have the Billable Cost showing the result of those Billable Records multiplied by the unit cost. The total for this search is $103.35.
But, let’s imagine that you don’t want to get 728 leads.
There are 2 different strategies that you can use to reduce the number of available records to what you would like.
Step 5: Limit Your Quantity #
2 Ways to Limit your Quantity #
Limit Quantity through Geographic Filter
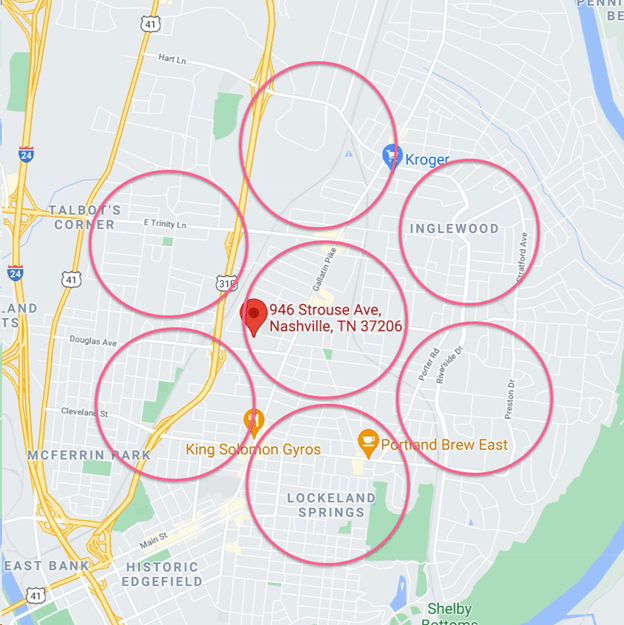
The first one is to simply make your geographic criteria smaller.
So going back to the geography screen, again, you can choose, for example, to use an address radius, that is a certain number of miles outside of a specific address.
We actually recommend that you use this method because it both reduces the number of available records, and also helps you to identify the area that are the hottest as you begin to get results from your text, ringless voicemail, and email campaigns.
So you can draw a five-mile radius around a specific address, and then continue to go around that radius as well, to create a targeted list for each radius.
There are times, however, when you may simply want to specify a quantity, for example, to get your free monthly lead credits, or to get the 10 free leads that you get on trial.
For this, you can use the List Settings link on the middle left-hand side, to type in a quantity.
Limit Quantity Via List Settings
The second way to reduce your quantity is to use the List Settings link that you see under Settings.
Simply type into the Limit Quantity To field on this page to limit the number of leads that you wish to generate, which will then reflect in the Results section after clicking on Update Settings.
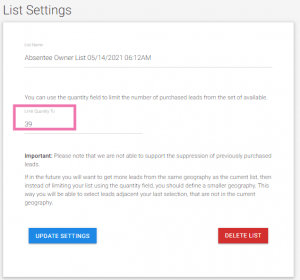
So for example, for this account that has 39 free remaining, we’re simply going to limit our quantity to 39. As you can see, your results on the left-hand side have now been reduced to a total billable cost of $0.
*Note: You are not limited to just 10 leads while on a trial. If you want to purchase more, you can, at the cost per skip-traced lead specified in the plan that you selected when you started your trial. The most recent plans are at www.reikit.com/pricing
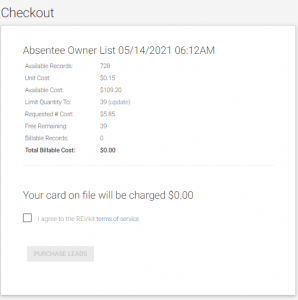
Step 6: Checkout #
After you have your criteria in place and are ready to have your list processed, click the Checkout button.
Order Review #
The next screen that appears allows you to review your order.
It also allows you to view what your card on file will be charged, if anything.
Double check, and then tick the checkbox.
Finally, click on the Purchase Leads button.
What you will see next is the final screen, showing you the Lead List is processing, until it finally is Complete.
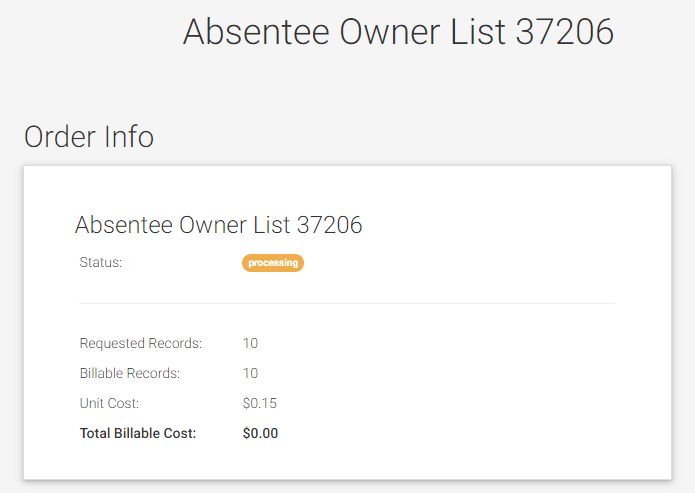
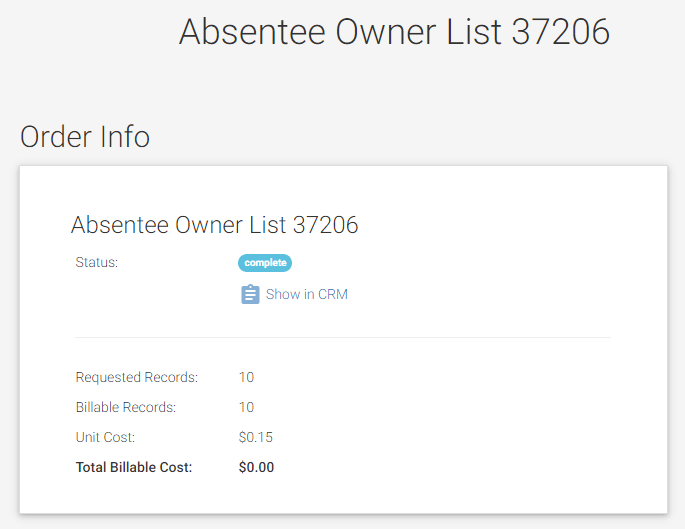
Once the process is complete, refresh your page to view the Show in CRM link, which will take you to a filtered view (by tags) of the CRM, only displaying leads that are tagged with the name of your list.
![]()
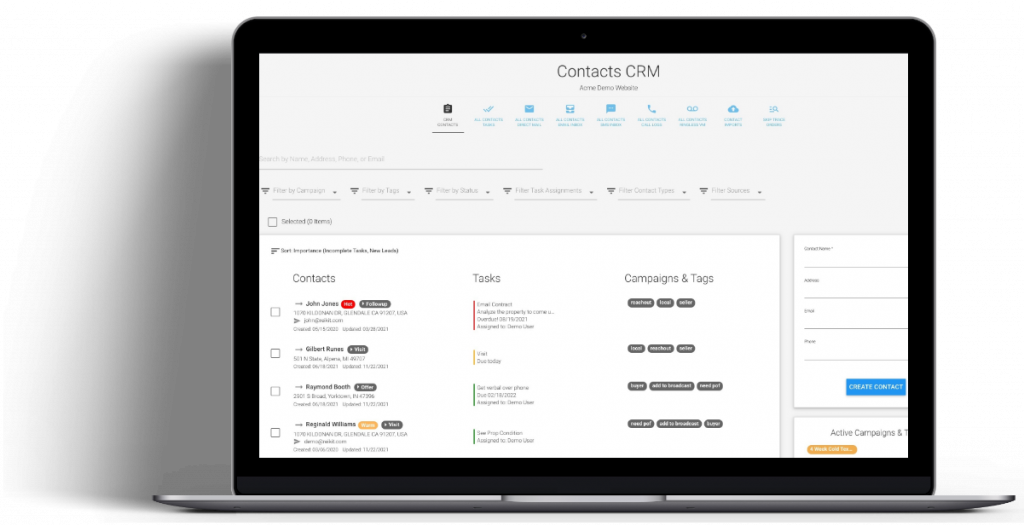
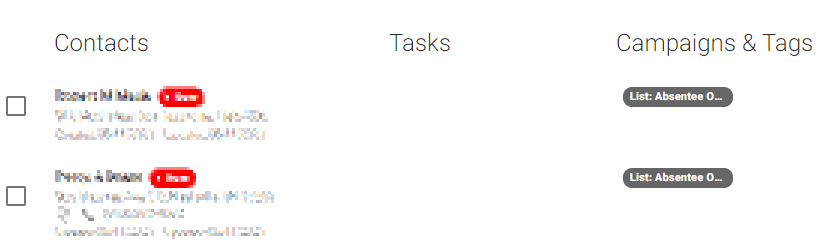
Finding Your Lists in the CRM #
Quick CRM Filtering Tips:
To view all of your leads in your CRM after applying a filter, simply click the gray “Clear Filters” bubble.
![]()
3 ways to find and filter only a specific list(s) that you purchased
-Filter by Tags with the name of the list
-Filter by Sources for the name of the list

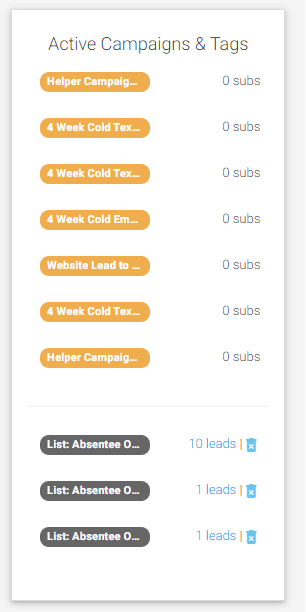
Locate the Tags
You will see this on the right hand side of the screen under the Active Campaigns and Tags box. Click on the light blue leads link to the right of the name bubble.
That’s it!
Now that you have your list of motivated seller leads in the CRM, you can now add those people to an automation campaign.