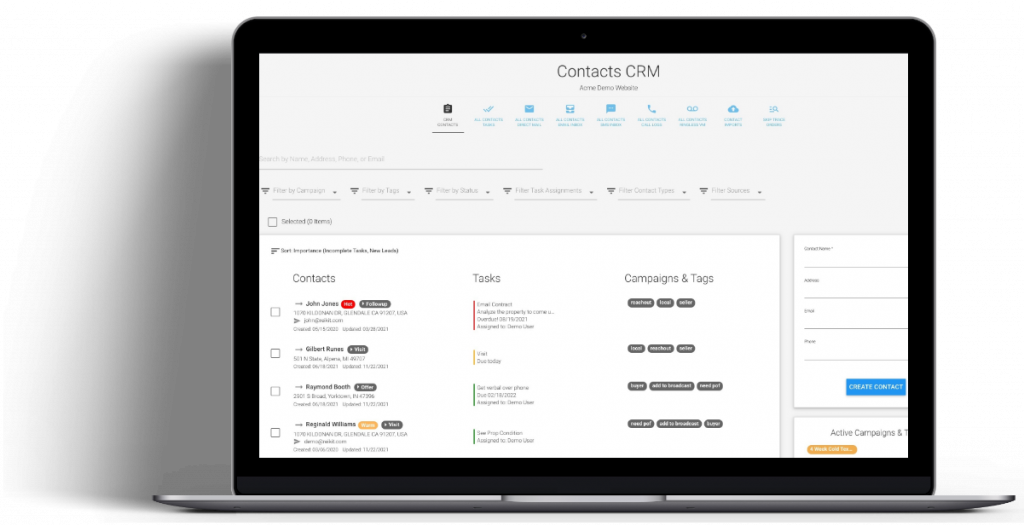
One of the best ways to get started with the CRM is to import the contacts that you already have into the CRM. You can do this using the CRM Contacts Import tool, found in the CRM section of REI/kit.
Contact Imports List #
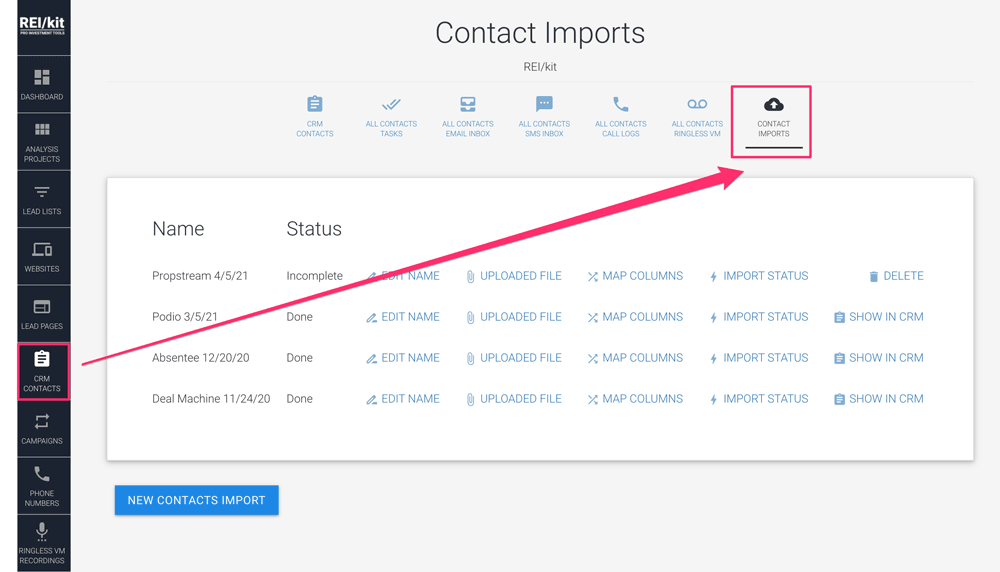
When you click on the “CONTACT IMPORTS” second level navigation button, you will be presented with the list of imports that you have previously started, if any, and all of the actions that you can perform on an import.
Starting a new Import #
In order to start a new contacts import process for a file of contacts that you have exported from elsewhere click the “NEW CONCTACTS IMPORT” button at the bottom of the imports list.
Import Steps #
Each time you import your file, you will follow these 4 steps:
- Name your import
- Upload your file
- Mapping the columns of your file to our CRM fields
- Verify any unmapped columns and import the file into the CRM
Each of these steps is described below.
Naming Your Import #
The first step when you create a new import is to name it.
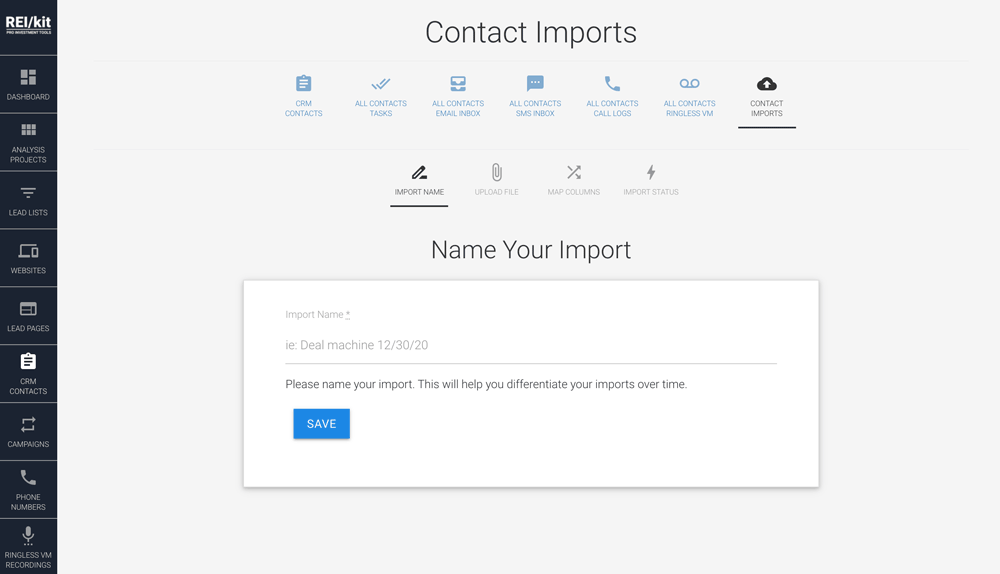
It’s useful to name it in such a way as to remember what data it contains, where it came from, and when. (ie: D4D Deal Machine 1/2/21)
You may use this information in a future import to speed up the process if you export data from the same source frequently.
Once you’re happy with the name of the file, click the “SAVE” button which will take you to the next step of uploading your file.
Uploading the File #
To upload a file, click on the “CHOOSE FILE” button, and select a CSV file from your computer.
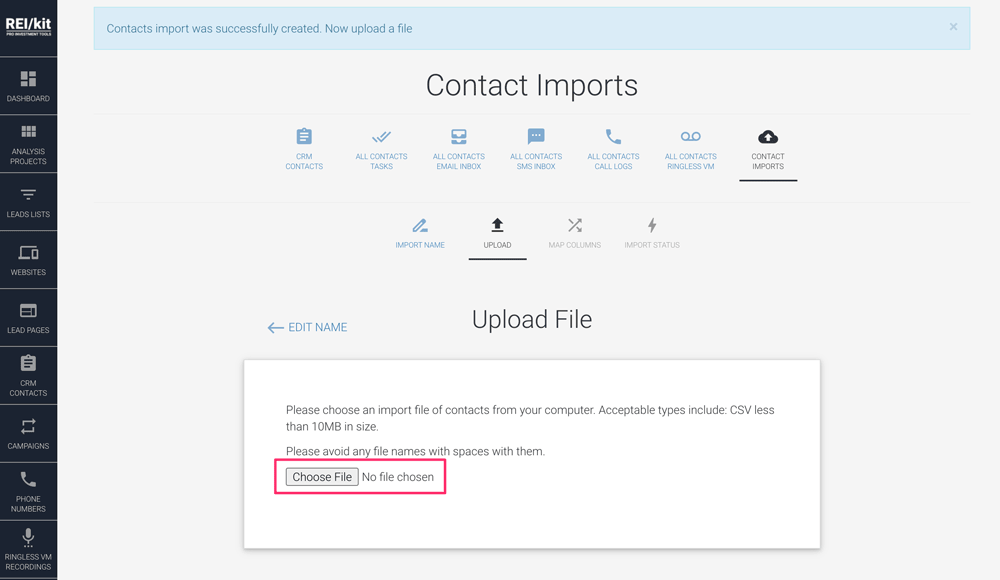
File Requirements #
Valid File Types #
The only valid file type is CSV. This stands for Comma Separated Values which can be easily saved from any Excel or Google Sheets document.
File Size #
You can upload csv files up to 10 MB in size.
First Line Header #
The first line in your file needs to contain the header columns, as these will be used for the next mapping step.
Updating the File #
As long as the import into the CRM is not currently in a Working or Done status, you can always come back to the upload step and update your file.
This is helpful when you are in the middle of a mapping and need to fix some of the data in your source file before re-uploading it and re-mapping it.
Mapping Columns #
The next step in the process is to map the header columns from your file, to the available CRM fields.
CRM Field Sections #
The CRM Fields are grouped into sections, starting with the Contact information, then with Property information.
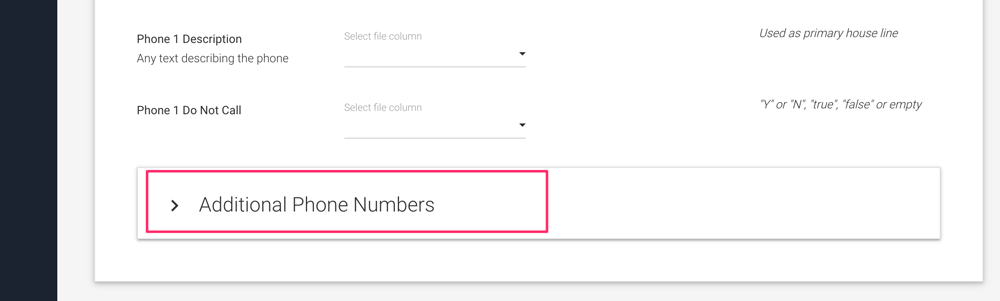
Within each section you may have any number of collapsed subsections.
For example in the Contact field grouping, you can expand the “Additional Phone Numbers” section to add additional phone number mappings.
Similarly, in the Property section, there are collapsed subsections to map columns for “OWNER 2”, “SPOUSE”, “PROPERTY VALUE” etc.
Mapping Tool Layout #
Each section in the mapping tool is laid out into 4 columns described below.
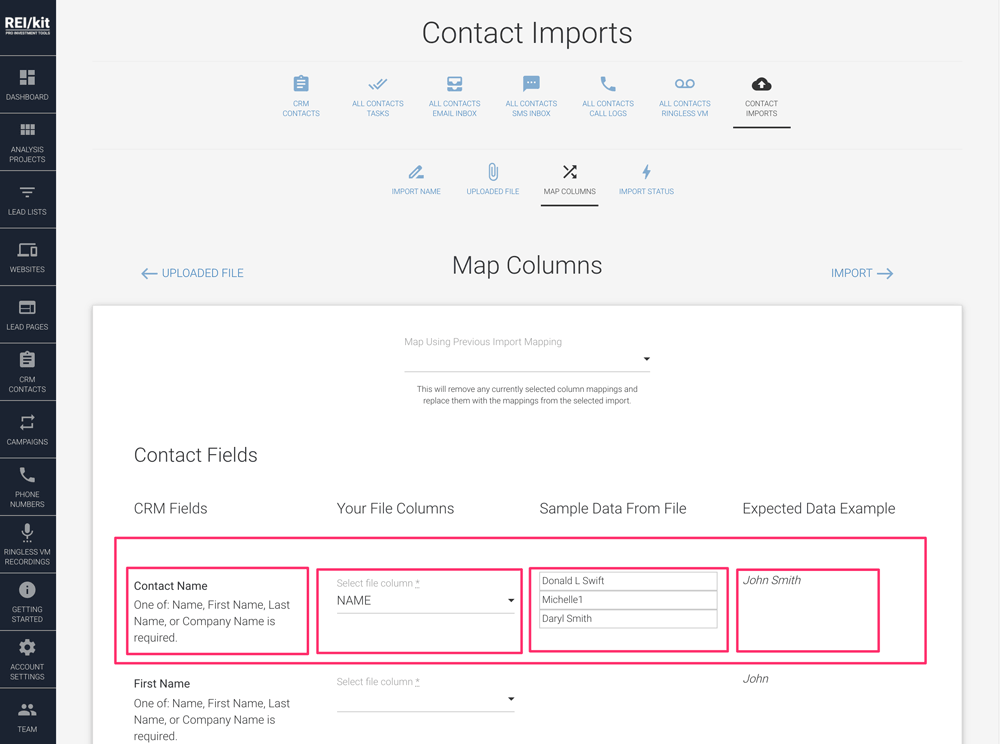
CRM Fields #
This is the destination field in the CRM to which you will try to map a column from your file.
File Columns #
This is a select box that will contain all of the headers contained in row 1 from your file that you will select from to map to the CRM Fields.
Only one column header from your file can be mapped to a CRM field, so as you map more and more fields, this select box will only contain any remaining unmapped headers from your file.
Sample Data #
When you first upload your file, the first 3 rows of your file are saved, and used for displaying sample data from your file.
When you map a File Column to a CRM Field, then that sample data from those first 3 rows will be displayed here so that you can compare it to the “Expected Data Example” column.
If there was no data in the sample of the first 3 rows, then the message “No data in first 3 rows” will be displayed.
Example Data #
This shows examples of the kind of data that is expected by the CRM for the import to work properly.
For example, for the “Property Occupancy” CRM field which expects only the values: “occupied”, “vacant”, “rented”, or empty.

If the “Sample Data” column, does not match the “Expected Data Example” column, then it’s very likely that the import will not work correctly.
Required CRM Fields #
In order for your import to work, you will need to map at a minimum at least one of “Name”, “First Name”, “Last Name”, or “Company Name”.
Phone Type Selection #
The one CRM field that you do not map to a column in your file is Phone Type. You only select the actual values for this field in the mapping.
If you do not select a Phone Type for any of your phones, then the default will be “Mobile”.
Advanced: Using a Previous Import Mapping #
After you have completed at least one import, the next time you perform an import of another file you will see a select box at the top of the “Mapping” tool which will allow you to use a previous import’s mapping as a starting point for this mapping.
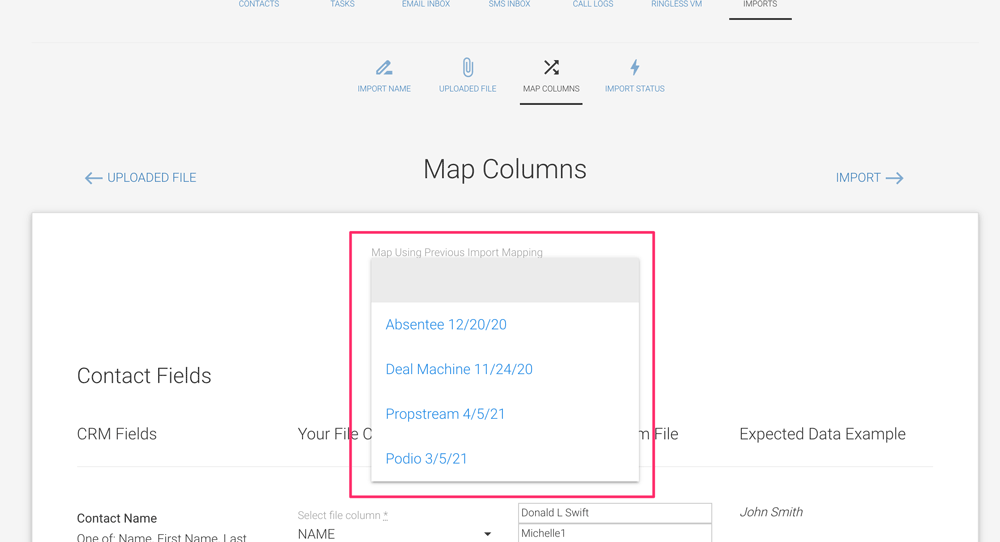
This is useful if you frequently export data from the same source, and therefore the export files always have the same headers.
If this is the case then selecting one of the previous imports from this select box will copy all of the mappings from that previous import into this mapping tool.
This does however remove any existing mappings that you may have selected for the current import, so if you use this select box, it is best to do this at the beginning of your mapping exercise.
Import Status & Finalizing Import #
Once you have completed mapping your file, the final step is to review any unmapped columns and import your mapped file into the CRM.
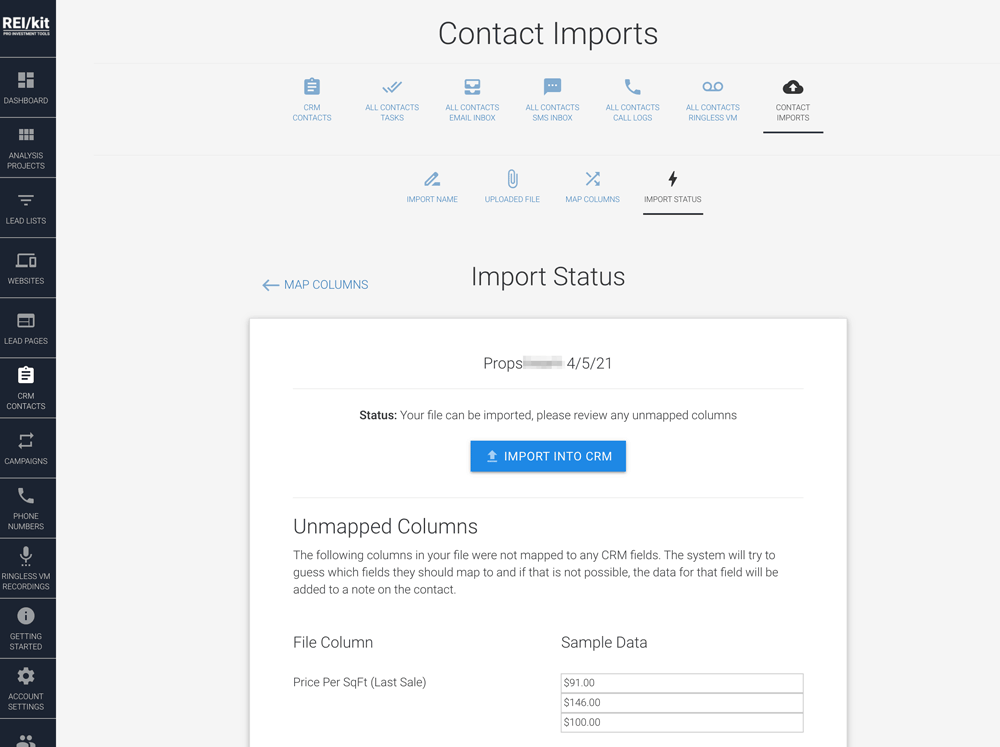
Unmapped Columns #
If you did not map all of the headers from your file to fields in the CRM, then this screen will show any of those columns for you to review.
If you missed mapping some, you can go back and add them to the mapping.
For any columns from your file that were not mapped, upon import, that unmapped data for that contact will be added to a note on the contact in the CRM.
Import Into CRM #
Once you are ready to start the import, click the “IMPORT INTO CRM” button which will begin the import process.
This process takes about 10 minutes for 1,000 records, and you will receive an email once it is complete.
Statuses #
There are several statuses that your import can be in.
Invalid #
This happens when you have not mapped all of the required headers from your file to the CRM fields. You will not be able to process the import until your mapping is valid.
Valid #
If you have finished mapping correctly, then the status will be Valid. You may still have unmapped columns, but the import will at least import the names of the contacts.
Working #
Once you have clicked the “IMPORT INTO CRM” button, your import will be in a working state until it has either completed or failed.
Once file processing has started, you can no longer make changes to the upload file or the mappings.
Done #
Once the import is completed, you will receive an email that it has completed. You will also be able to show the import in the CRM which filters your CRM contacts to those that have the source file name as the source.
Failed #
An import can fail for any number of reasons, usually data related. Please reach out to us if you experience a failure so that we can help you update your file.
After Importing – Finding Your Contacts #
Once the import has completed, then you can find your imported contacts in the CRM using:
- The link in the notification email when complete
- The link in the Import List
- The link in the Import Status screen
- By filtering your CRM by source where the source is the imported file name