Campaigns #
Getting Started with Marketing Campaigns #
What are Automated Campaigns? #
There are a lot of different names used to describe email and text automation systems:
- email or text campaigns
- auto-responders
- marketing automation
- trigger campaigns
- email or text sequences
- funnels
- drip campaigns
…the list goes on.
Terminology #
Within REI/kit, we call this automated workflow of sending a sequence of direct mail, texts, or emails, ringless voicemails or assigning tasks a Campaign.
A single campaign can have any number and combination of sequence items. These are the direct mail, texts, email, ringless voicemails or tasks that are delivered on a schedule.
The delivery schedule and order of these campaign sequence items is called a sequence.
Campaign templates are templates for campaigns with sequence items that we have pre-written for you to use when creating a new campaign.
A contact is an entry of a person in the CRM. When a contact is added to a campaign, they are then called a subscriber to the campaign.
Workflow for Subscribing Contacts to Campaigns #
A campaign is something that you create once, and then add contacts to it to trigger the sending of the sequence items to that contact, for a particular end goal such as getting the contact to get in touch with you.
Once you have created a campaign, you can use it over and over, simply by adding more and more contacts to the same campaign.
In other words, it is not necessary to create a new campaign for every new batch of leads that you get.
You can subscribe a contact to a campaign one at a time from the contact profile, or in bulk by selecting multiple contacts in the CRM.
In general, the workflow for adding contacts to a campaign is as follows:
- First create a Campaign and publish it
- Get a lead list using the Lead Lists tool, or upload your own list of contacts to the CRM
- Add your leads to your campaigns by bulk selecting them in the CRM and adding them to the Campaign
Creating a Campaign #
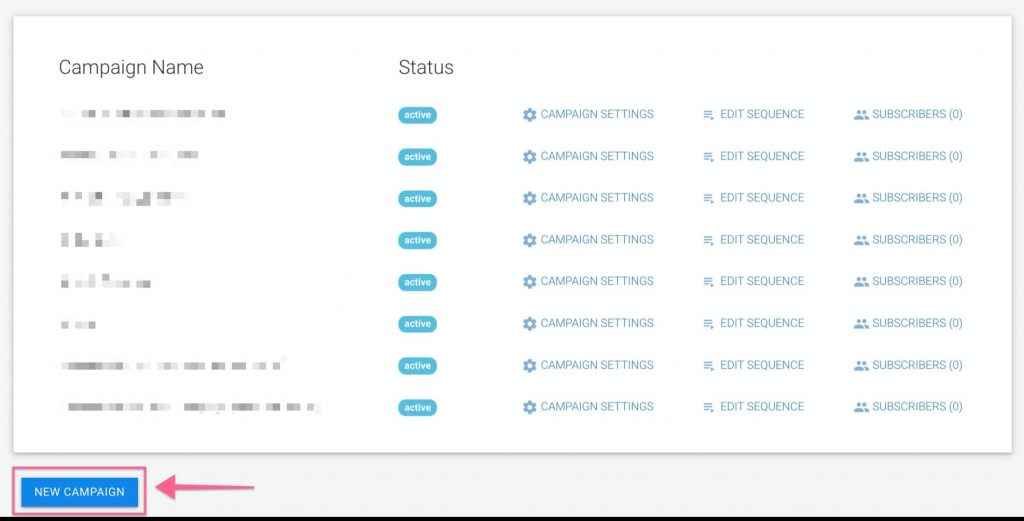
To create a campaign, navigate to the Campaigns tool at https://tools.reikit.com/campaigns
Click on the ‘New Campaign’ button:
Campaign Templates #
When you first create a campaign, you can choose to start with a Blank campaign, or you can use one of our Pre-Written Email, Text, and Task Campaign templates as a starting point.
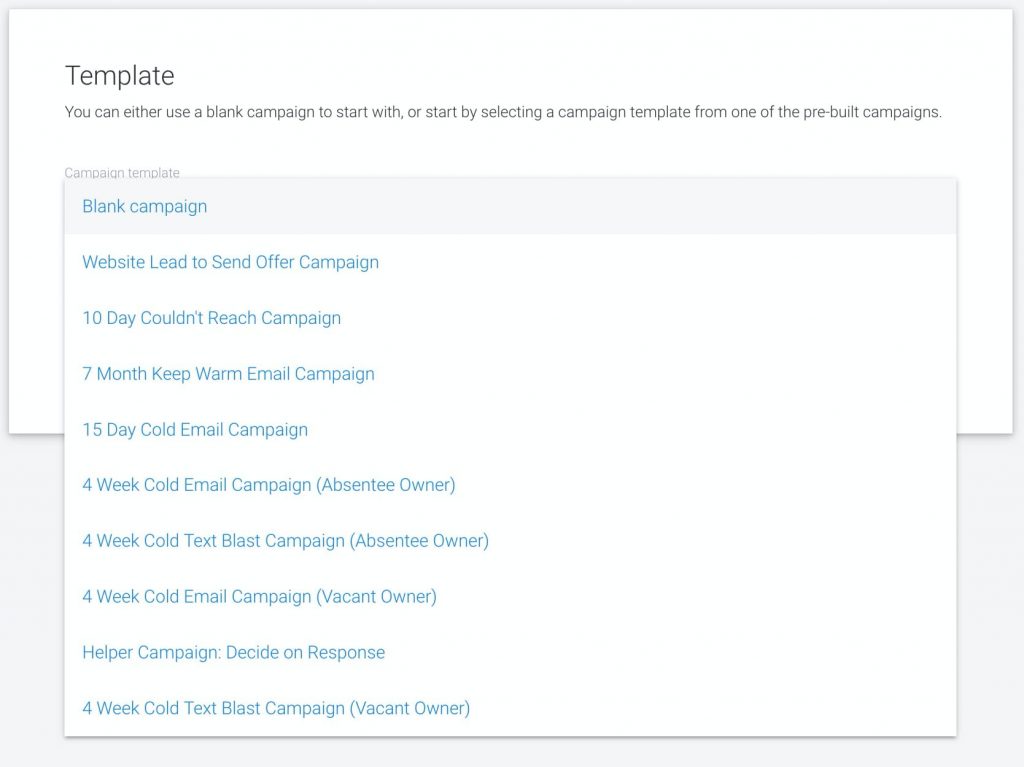
If you create a Blank Campaign, it will contain no sequence of items, and you will need to also create your own sequence of emails, texts, or tasks.
If you create a Campaigns from one of the templates, then the system will generate the sequence of emails, texts, and/or tasks, complete with all of the pre-written content for you. You can then edit and personalize that content to make it your own.
It is recommended that you start with one of the pre-written campaigns to get an idea of how all of the pieces work together.
Done-for-You Campaign Template Descriptions #
The following Campaign template sequences are available for you in the tool:
Website Lead to Send Offer
10 Day Couldn’t Reach campaign
7 Month Keep Warm campaign
15 Day Cold Email campaign
4 Week Cold Email campaign (Absentee Owner)
4 Week Cold Text Blast campaign (Absentee Owner)
4 Week Cold Email campaign (Vacant Owned)
4 Week Cold Text Blast campaign (Vacant Owned)
Helper campaign: Decide on Response
For more information on each of the campaigns specifically, as well as when you would use each campaign template, see this guide:
Guide to Marketing Automation Campaign Templates
Naming Your Campaign #
If selecting from one of our pre-written campaign templates, there is no need to name the campaign as it will just use the template name.
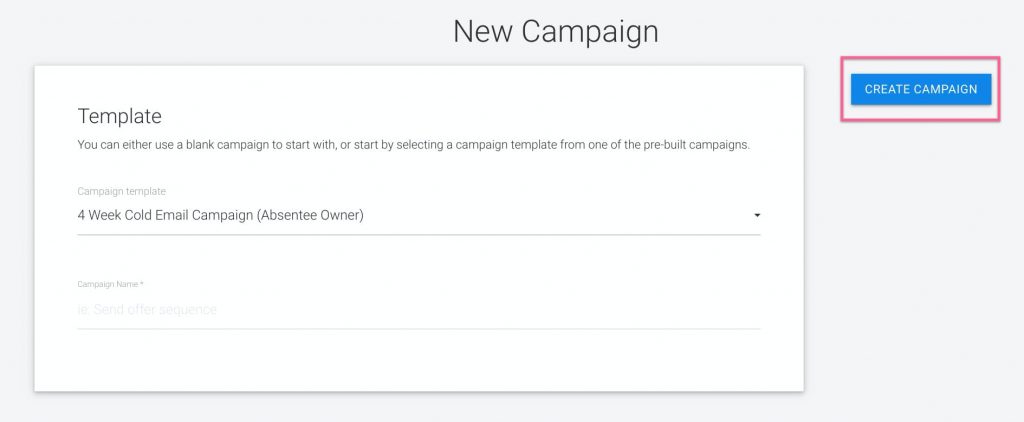
However, if you plan on having different variations using the same campaign template, then you should change the names to identify those variations.
If creating a new Blank campaign, you do need to give the campaign a descriptive name, so that you can differentiate it from other campaigns.
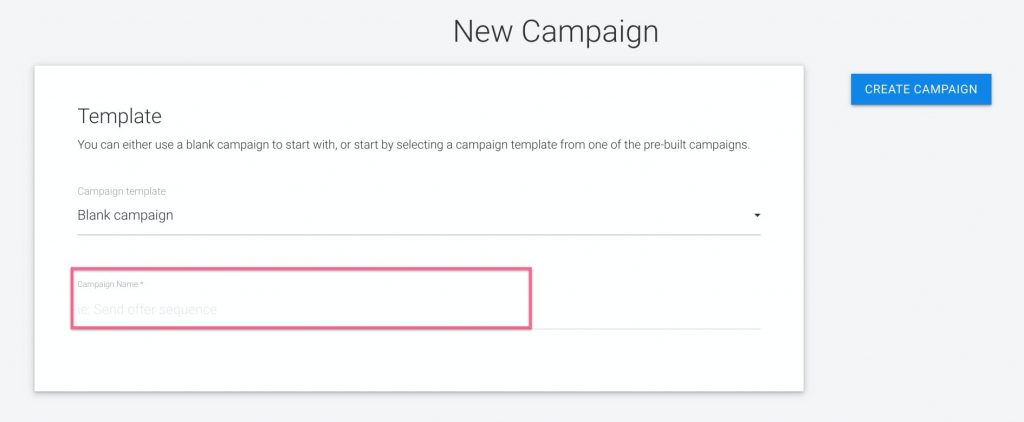
After you click the button to create a pre-written or blank campaign, the next screen is the Campaign Settings.
Campaign Settings #
It’s important to note that the Campaign Settings screen is the same for any Campaign that you create, in that the screen displays settings for both emails and SMS messages.
For example, the email display name field is shown, as well as the virtual phone number selection for SMS messages.
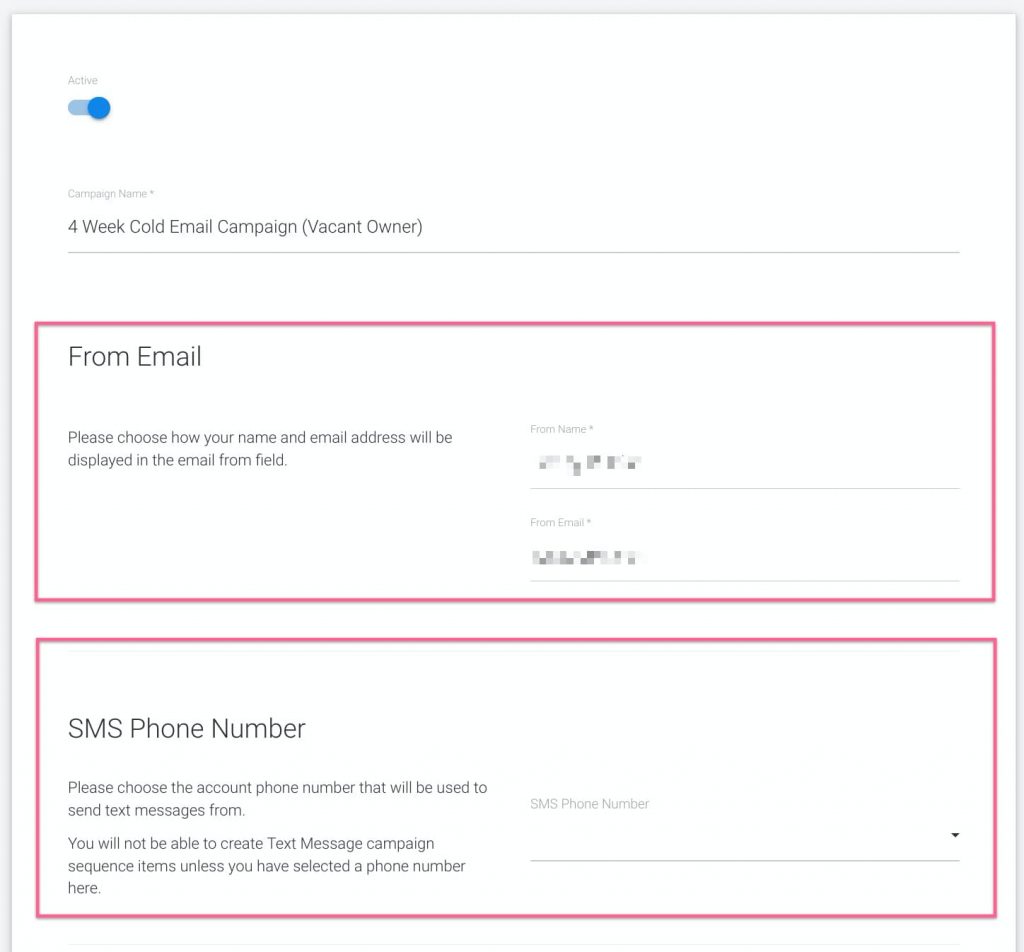
These are the different sections on the Campaign Settings screen:
From Email #
You will enter your ‘From Name’ and ‘From Email’ in these fields.
You can choose how the From Name appears in your lead’s inboxes, as well as the email address that the replies will go to.
The email address will be automatically pre-filled with the User Profile email address as found in the Account Settings.
It is highly recommended that the email address be the email address that is either associated with the account in the account settings, or the email address associated with the team member who will be responsible for following up with the leads.
Using any email not associated with your team in the system will make it impossible to record the email communications in the CRM.
Direct Mail Return Address #
If you will be sending any direct mail in this campaign then please choose the return address that will be used to send the mail from.
You will not be able to create any direct mail campaign sequence items or send any of them unless you have selected a return address here.
SMS Phone Number #
Here you select from the drop-down list the Virtual phone number that you created in REI/kit Phone Numbers tool.
You will not be able to create any SMS campaign sequence items or send any of them unless you have selected a phone number here.
Send Time #
Enter in the time that the emails from each sequence item should go out each day and double-check the selected time zone.
First Sequence Item Settings #
There are two options in the drop-down menu for this setting: ‘Send Immediately’ and “Next specified send time.’
Send immediately #
If you choose ‘Send immediately’ to have your first email sent immediately, it will override your settings in the ‘Send Time’ section.
Keep in mind that the tool will schedule your emails to send immediately to your leads, after you have added your leads to the campaign.
Next specified send time #
If you choose ‘Next specified send time’, it will use the ‘Send Time’ section settings.
Keep in mind that the actual time that you add your leads to a Campaign determines the time your leads will be scheduled to send if you select ‘Next specified send time’:
If you add your leads prior to the ‘Next specified send time’, it will send at the specified ‘Send Time’ that same day.
However, if you add your leads after the ‘Next specified send time’ then it will send the next day at the specified ‘Send Time.’
Stop This Campaign After Reply #
Stop on Reply #
‘Stop on Reply’ will remove the lead (subscriber) from the Campaign if the lead replies to your email.
This is generally the best setting as you do not want to continue to send emails to someone who has already replied.
Send Entire Sequence #
For some campaigns, however, such as the Website Lead to Send Offer campaign, or any others where you want the campaign to perform the actions for all of the items in the sequence, such as Tasks, you would select ‘Send Entire Sequence.’
Move to Another Campaign After Reply #
Choose whether to move a subscriber to a different campaign when they reply.
For example, if you have created a Helper Campaign Decide on Response that will notify you when a lead replies via task creation in the CRM, you would select Helper Campaign Decide on Response from the dropdown.
After This Campaign Ends #
If you would like to move the subscriber to a different campaign that you have created, after the current campaign is finished, select it from the drop-down menu.
You may choose to do this if a subscriber has received all of the emails in a sequence and is still non-responsive. Move them to another campaign that keeps your business top of mind when they are ready to sell.
Viewing Email Metrics #
REI/kit tracks the following email metrics for any email that is sent within a campaign.
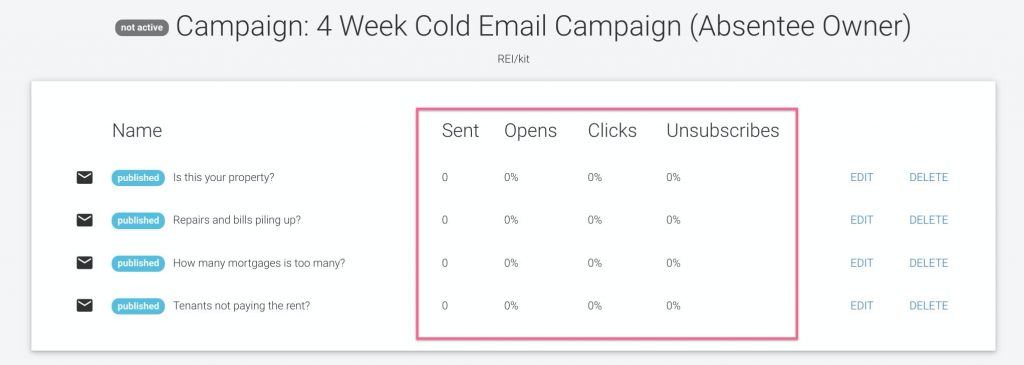
Sent: The number of times an email was delivered to a recipient
Opens: The number of recipients who opened the email
Clicks: The number of times any recipient clicked on a link within an email
Unsubscribes: The number of recipients who unsubscribed from the campaign
To view these metrics and how a specific campaign is performing, click on the Edit Sequence link in the main Campaigns screen.

Duplicating Campaigns #
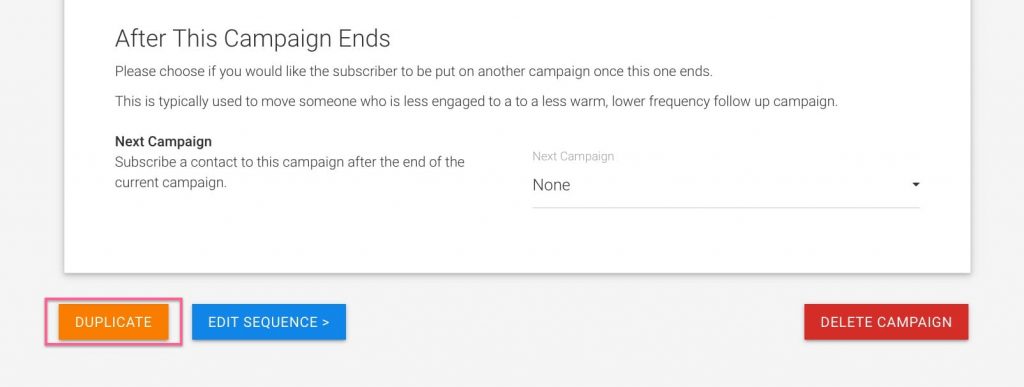
If you have created a blank campaign, but you want to use it for another purpose, or simply change up a bit of the text but leave most of it the way it is, you can Duplicate the campaign.
This is found at the bottom of the Campaign Settings screen on the left hand side:
Deleting Campaigns #
To permanently delete a Campaign, scroll down to the bottom of the Campaign’s Campaign Settings screen and click on ‘Delete Campaign’:

Note: This action is not reversible.
Troubleshooting Campaigns #
Created Campaign Not Appearing in Drop-down Menus #
Q: I don’t see a Campaign I created in the drop-down menus in the Campaign Settings screen.
A: Campaigns must be Published in order for them to appear in the drop-down menus.
Getting ‘Cannot Activate Campaign’ Email error message #
Q: I get ‘Cannot Activate’ error message when I try to activate an email campaign:

Cannot activate campaign until the company profile in your account settings is complete.
A: The Company Profile in your Account Settings located here:
https://tools.reikit.com/settings/profile
must be filled out for CAN-SPAM purposes before your email campaign can be Published.
Getting ‘Cannot Activate Campaign’ SMS error message #
Q: I get ‘Cannot Activate’ error message when I try to activate an SMS campaign:

Cannot activate a campaign that has SMS sequence messages where the campaign does not have a SMS sending number.
A: You must specify in the Campaign Settings screen what virtual phone number you wish to use for the campaign, in the Phone Number drop-down menu:

If you have not set up your virtual phone number yet, go to your Phone Number settings.
This concludes the knowledge guide for REI/kit marketing automation campaigns.
Next #
Next we’ll learn how to add campaign sequence items to our campaign in: How to Add Campaign Sequence Items


